
With a Google account, you will be able to configure SSO in 2 ways, OAuth & SAML. The steps required to configure both options are listed below. *Only one option can be used at a given time.
Configuration using OAuth
Google APIs use the OAuth 2.0 protocol for authentication and authorization. Google supports common OAuth 2.0 scenarios such as those for web server, installed, and client-side applications.
Steps for Configuration
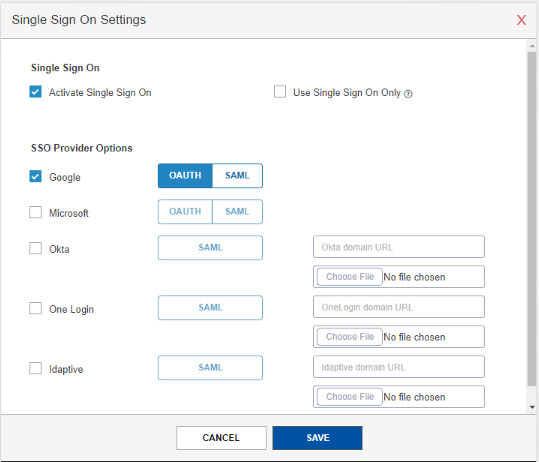
- GO-1: Login to your Ostendio instance
- GO-2: Select “System Settings” option in RHS top Menu (“gear” icon)
- GO-3: Click on “Single Sign-On” (“edit” icon)
- GO-4: Click on “Activate Single Sign On”
- GO-5: Select “Google” under “SSO Provider Options”
- GO-6: Select “OAuth” in-front “Google”
- GO-7: Click “Save”
Configuration using SAML
Using Security Assertion Markup Language (SAML), you can use your G Suite credentials to sign in to enterprise cloud applications via Single Sign-On (SSO).
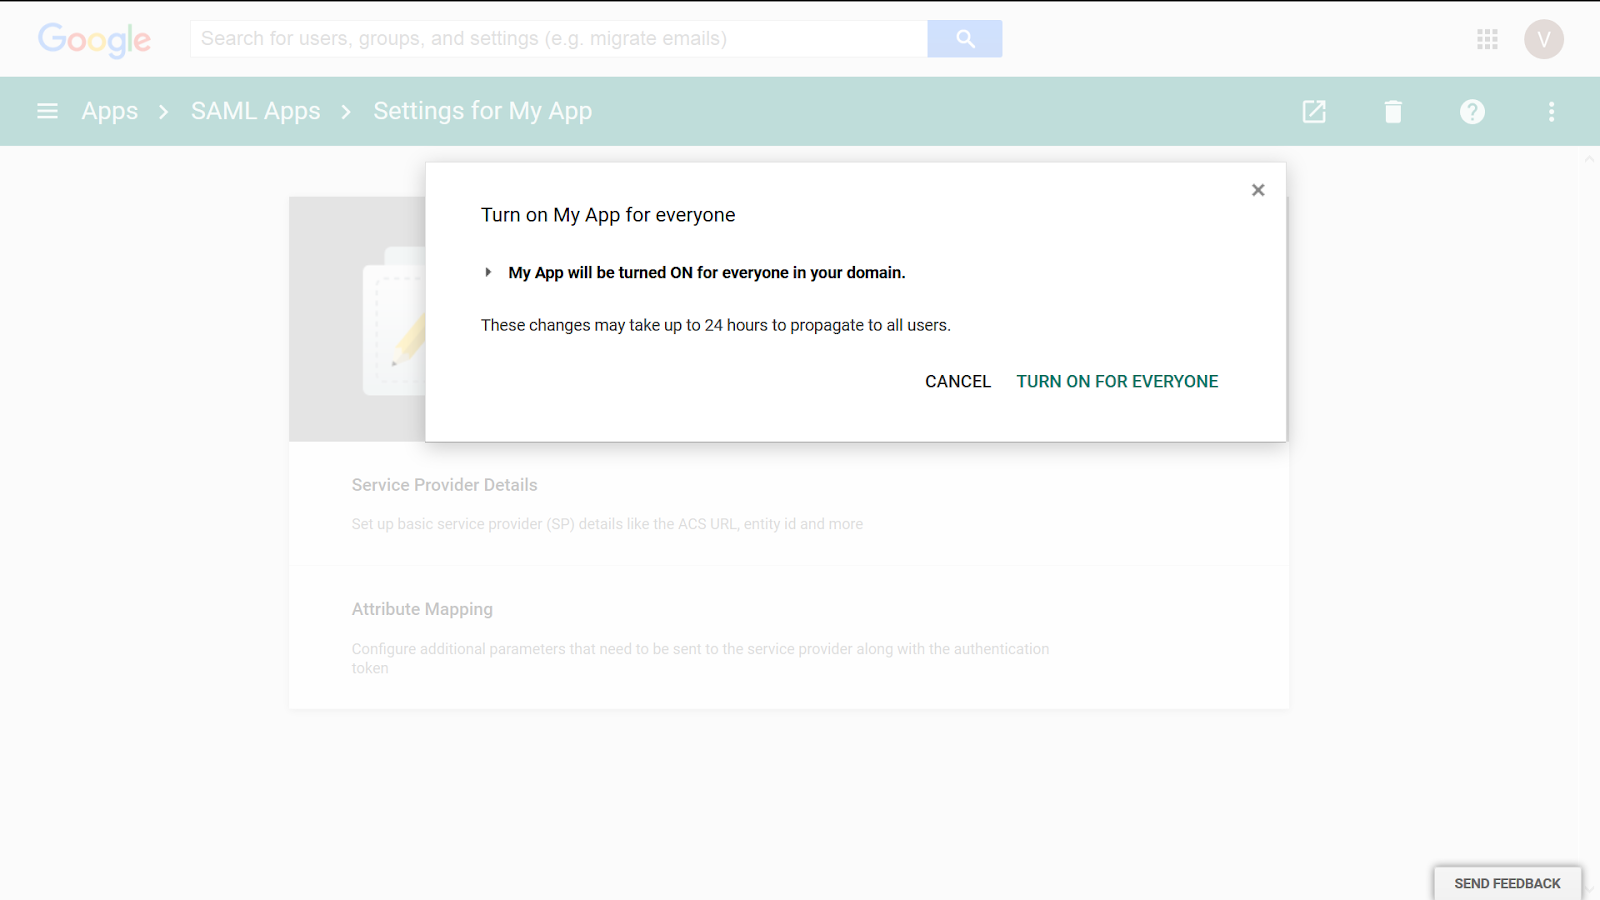
Note: Google states that SAML apps may take up to 24 hours to propagate to all users.
Steps for Configuration
- GS-1: Sign in to your Google Admin console using your administrator account
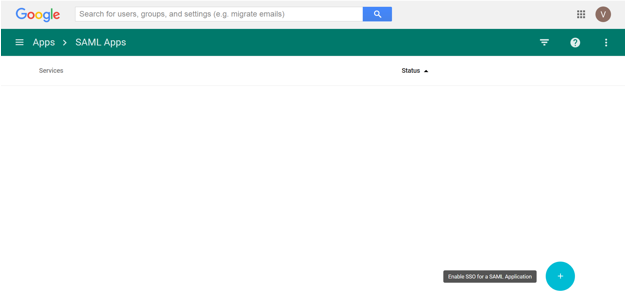
- GS-2: Select “SAML Apps” under “Apps”

- GS-3: Select the Add a service/App to your domain or click the plus (+) icon in the bottom corner
- GS-4: Click Setup my own custom SAML App

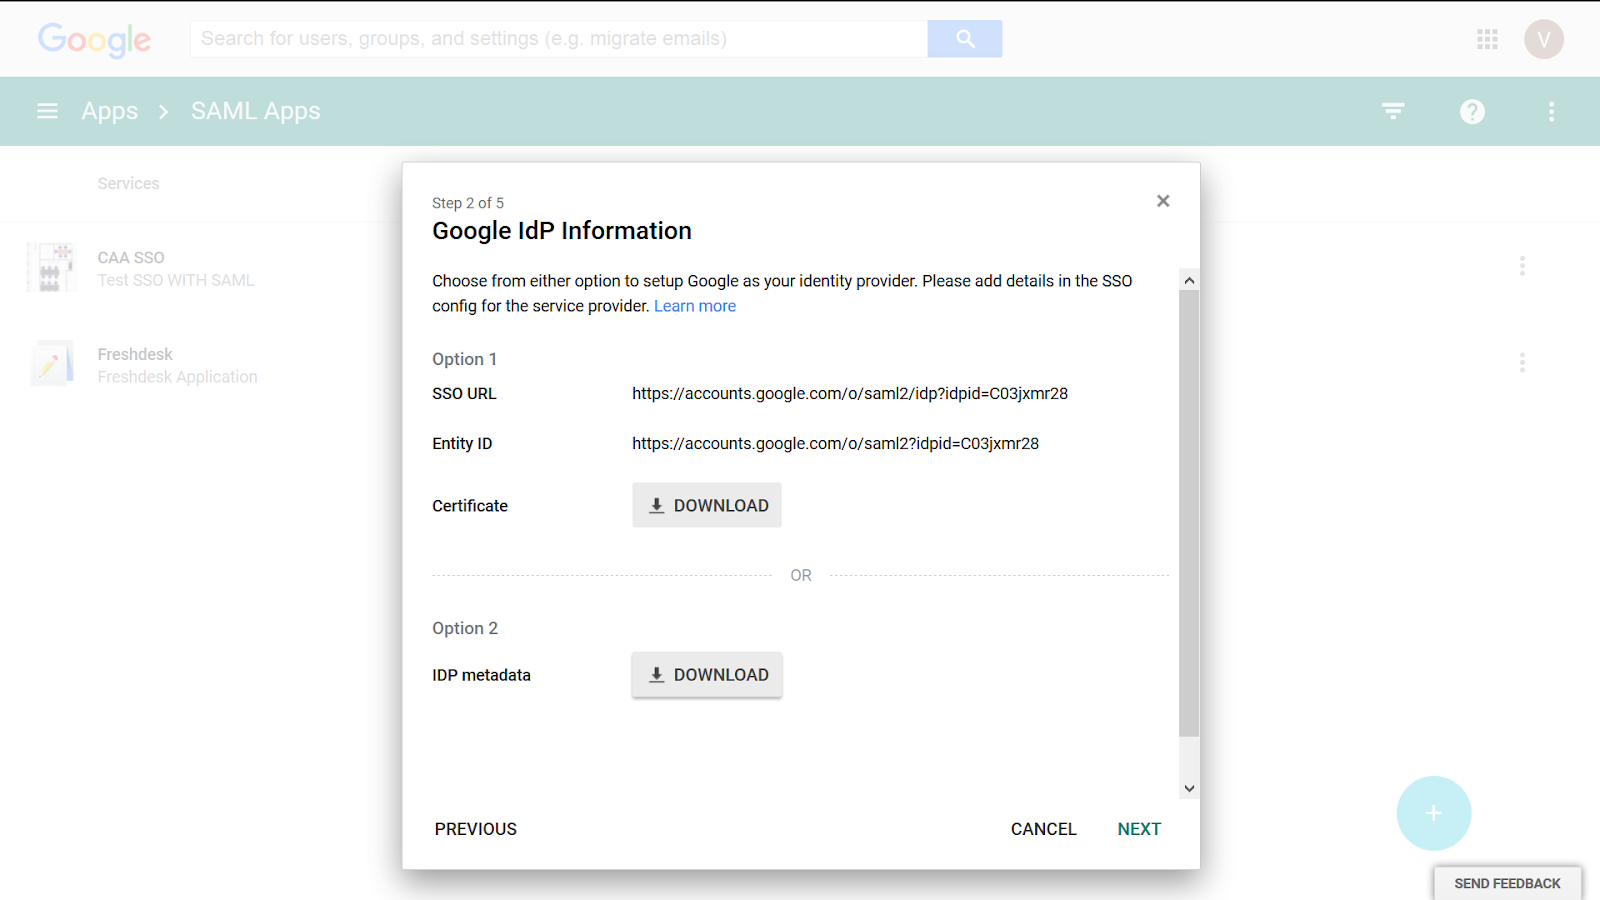
- GS- 5: Download the IDP metadata and save it (this will be used in later steps)
- GS-6: Go back to the admin console and click “Next”
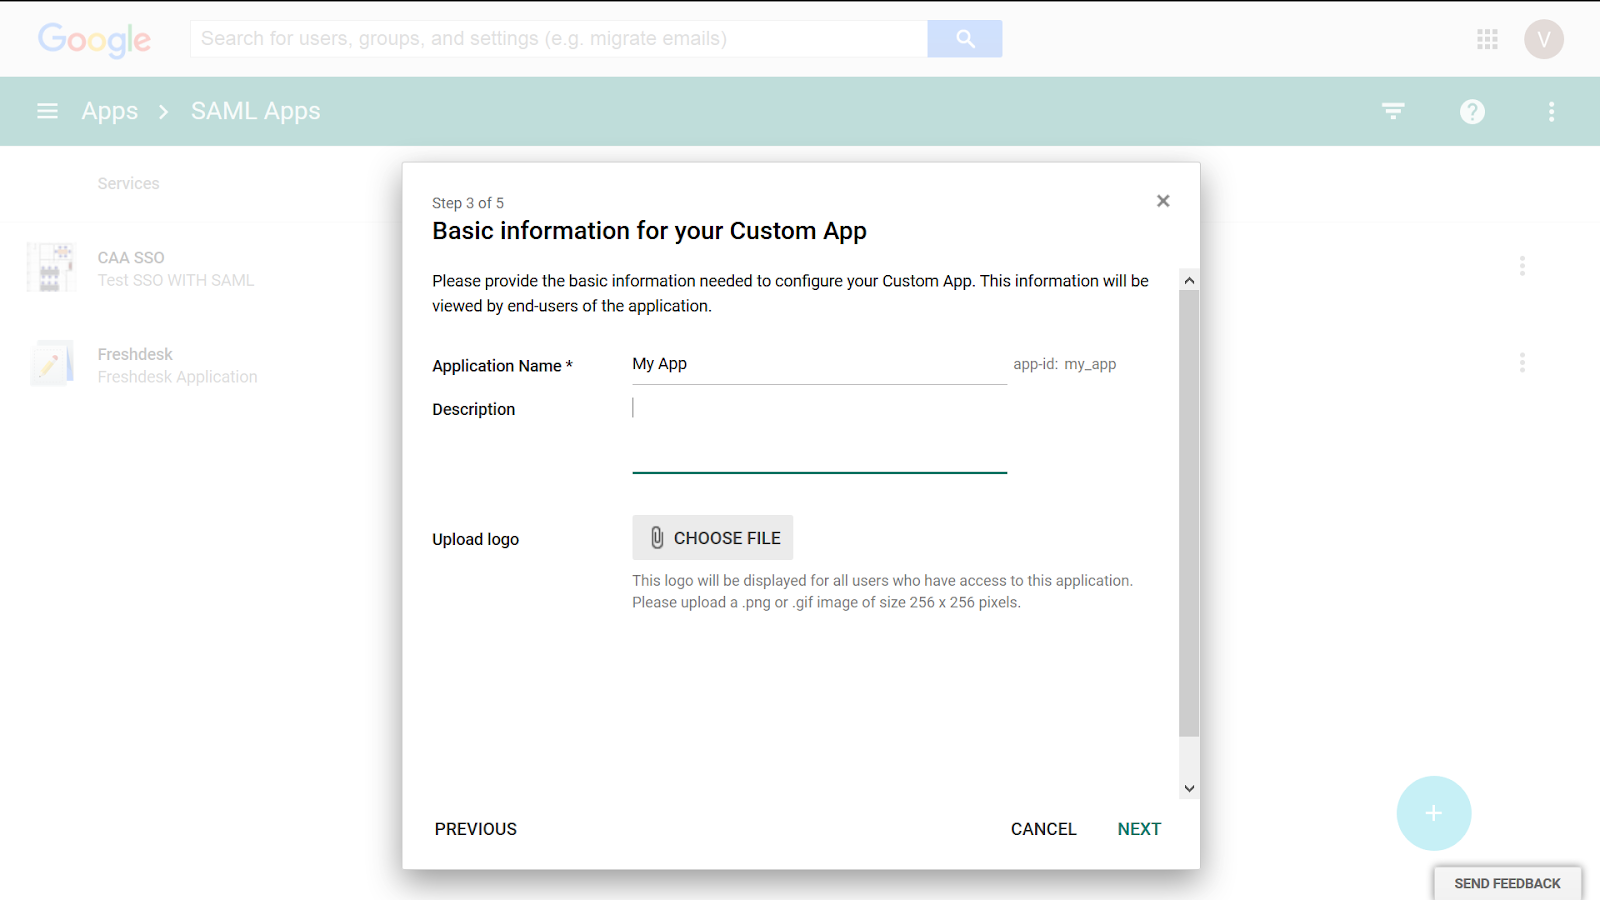
- GS-7: In the Basic Application Information window, enter application name as “Ostendio” and enter a short description.
- Click “Choose file” next to the Upload Logo field to upload a PNG or GIF file to serve as an icon.
- Ostendio logos are available at https://www.ostendio.com
- GS-8: In the Service Provider Details window, enter the following information
- ACS URL
- This is the SSO URL for SAML.
- https://<your-domain>.ostend.io/main/resultssogateway.aspx
- Entity ID
- Same as ACS URL
- Start URL
- This will be URL of your Ostendio Instance
- https://<your-domain>.ostend.io
- Signed Response
- Leave unchecked
- Name ID
- “Basic Information” should be set to “Primary Email”
- Name ID Format
- Select “Email”
- ACS URL
- Click “Next” to proceed

- GS-9: Do not make any changes on this screen and click “Finish”

- GS-10: Click “OK” and close the window

- GS-11: On the next screen click the setting icon and choose “ON for everyone”
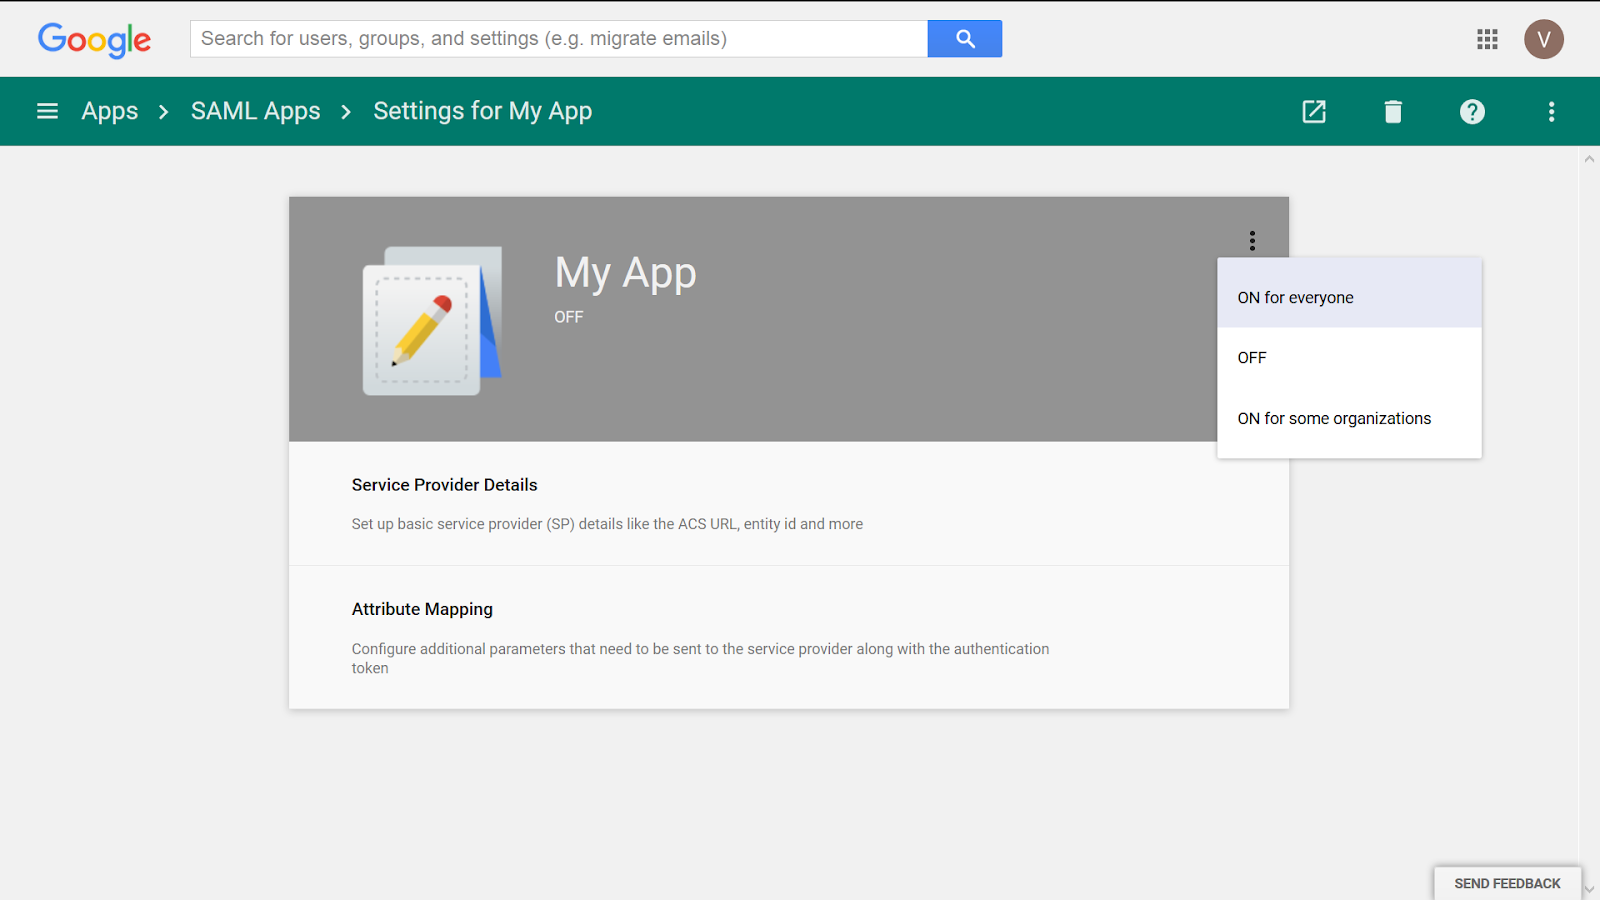
- Click “TURN ON FOR EVERYONE”
- GS-12: The app will now start to appear under the google apps icon

- GS-13: Follow steps GO-1 to GO-5 as provided and then
- Select “SAML” in-front “Google”
- Upload Idp file downloaded in step GS-5. This field is mandatory
- Click “Save”
