
Okta provides single sign-on and identity management for cloud-based applications. *Okta provides SAML option only. The steps required to configure SAML are listed below.
Configuration using SAML
Steps for configuration
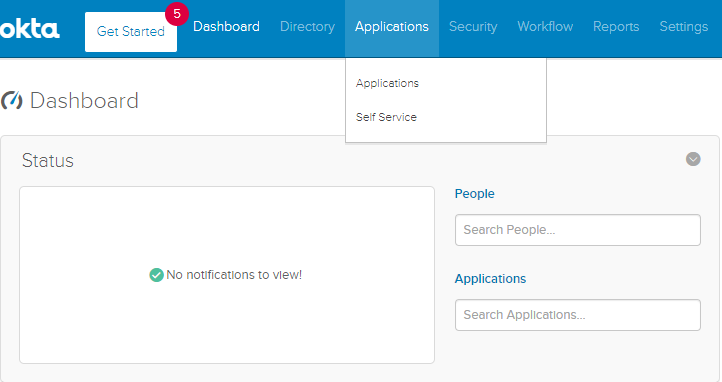
- OKS-1: Login to your Okta instance
- OKS-2: Select “Application” under “Applications”
- OKS-3: Select the "Add Application" a service/App to your domain
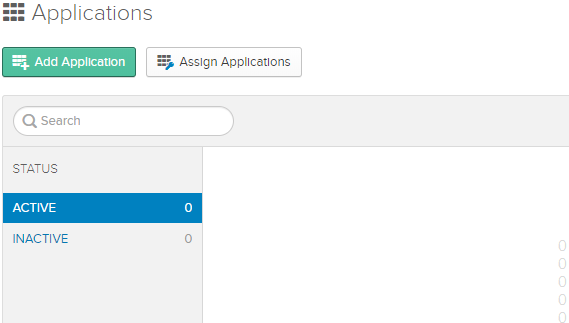
- OKS-4: Click “Create New App”

- OKS-5: Select the "SAML 2.0" option and click "Create"

- OKS-6: In the General Setting Information window, enter application name as “MyVCM” and enter a short description
- Click Choose file next to the Upload Logo field to upload a PNG or GIF file to serve as an icon.
- Ostendio logos are available at https://www.ostendio.com
- Click Next.

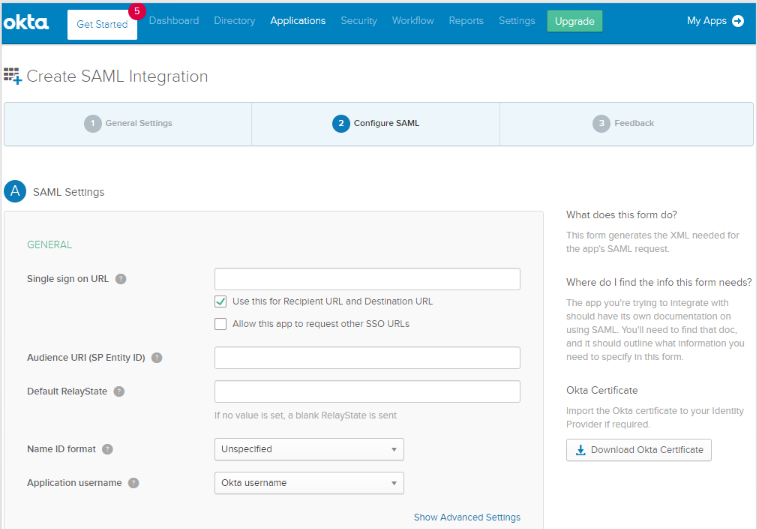
- OKS-7: In the SAML Settings Details window, enter the following information.
- Single sign on URL
- This is the SSO URL for SAML
- https://<Your-domain>.ostend.io/main/resultssogateway.aspx
- E.g.: abcd.ostend.io, xyz.ostend.io/main/resultssogateway.aspx etc.
- SP Entity ID
- Same as ACS URL
- Name ID
- "Basic Information" should be set to "Primary Email"
- Application username
- Select “Email”
- Click “Next” to proceed
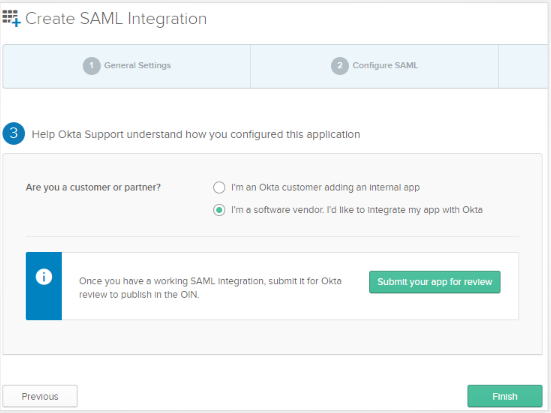
- OKS-8: Do not make any changes on this screen and click “Finish”
- OKS-9: Click in View Setup Instructions

- OKS-10: Save the URL mentioned in “SAML 2.0 Identity Provider Single Sign-On URL” (This will be used in later steps).
- This URL will be used to provide link on the xxxx.MyVCM.net login page for SSO link.
- OKS-11: Download Okta certificate.
- OKS-12: Follow steps GO-1 to GO-4 as provided and then,
- Select “Okta” under “Select SSO Options”
- Upload certificate file downloaded in step OKS-11. This field is mandatory
- Provide “Okta Domain URL” save in step OKS-10. This field is mandatory
- Click “Save”
