- Knowledge Center
- Ostendio API’s & Integrations
- API’s & Integrations Overview
-
Basic Employee Training
-
Video Resources
-
FAQ
- Admin Portal
- Application Security
- Assets
- Assessment
- Audit
- Change Management
- Communication and Notifications
- Compliance Manager
- Data Security
- Document
- Endpoint Security
- Framework Control Manager
- Human Resources
- Incident Response
- Identity & Access Control
- Infrastructure(Network) Security
- Integration
- Physical security
- Policy and Procedures
- Report
- Risk Management
- Security Awareness Training
- SSO
- Ticket
- Training
- Users
- Vendor Management
- Vulnerability Management
- Miscellaneous
-
FAQ's for Admins
-
Release Notes
-
Role Management
-
Compliance Manager
-
Ostendio Document Wiki
-
Ostendio Crosswalk™
-
System Settings & Billing
-
Vendor Connect
-
Documents
-
Auditor Connect
-
Crosswalk Assessments
-
Assessments
-
Audits
-
Training
-
Tickets
-
Users & Groups
-
Ostendio API’s & Integrations
-
Risk Management
-
Collections
-
Office Hours
-
Partner Admin Portal
-
Framework Control Manager
-
Reports
-
Assets
-
Ostendio Platform Set-up
API's & Integrations: Getting Started
How to activate API’s & Integrations
Locating the Manage Integrations page

Step 1
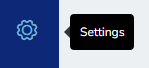
Near the bottom of the main menu, click on the Gear icon to access Settings
Step 2
Within the System Settings, locate the API section and click to activate API's.
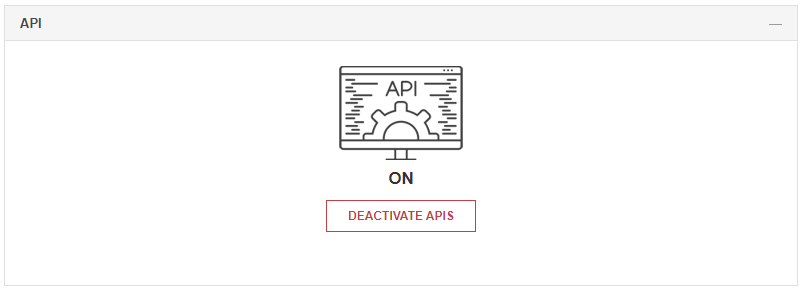
API's and Integrations are available to Premium Plus and Enterprise plans.
Please reach out to your CSM for additional plans.
Step 3
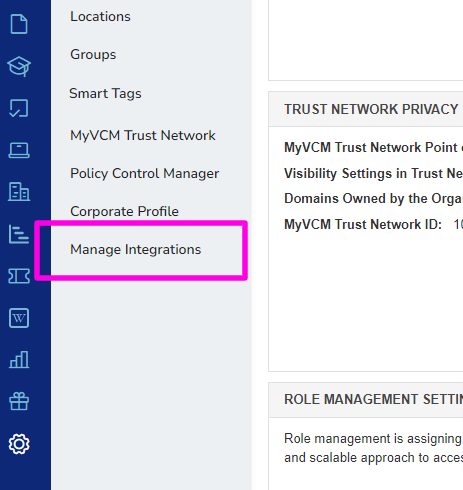
Click on Manage Integrations
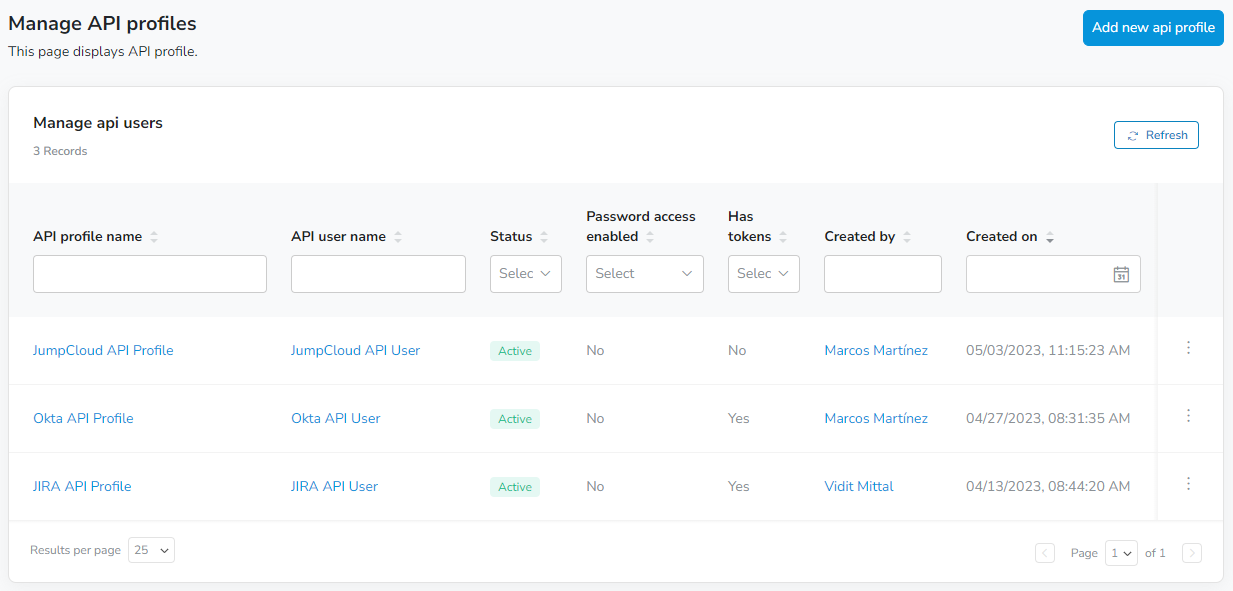
With API's turned on, the next step is to create and manage your API User Profiles. These profiles manage the connection between Ostendio and the integration.