Steps on how to configure the approval process and hierarchy and approve a document.
Setting up the Approval Hierarchy:
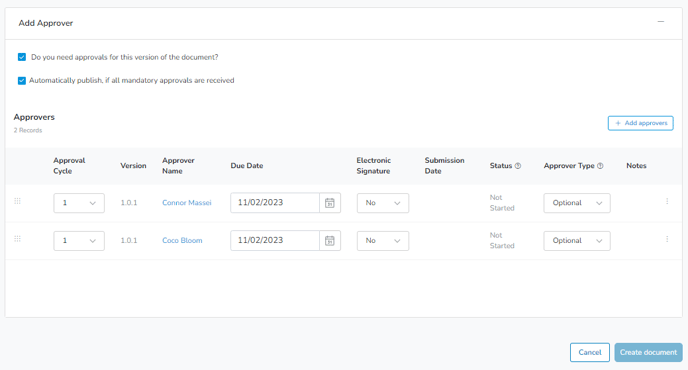
- When creating a new Document in Ostendio, add any Users that are required to approve the Document as an 'Approver'.
- Indicate whether you would like the Document to Publish automatically upon approval from all Mandatory Approvers
- Segment each Approver to an Approval Cycle; Approvers in any cycle will not receive a notification or action to Approve a Document until the Approval process has advanced past the previous cycle.
- Set a Due Date for each Approver. The Approval Cycle will not advance to the next cycle until the due date has been reached
- Choose the Approver Type for each Approver
Approver Types:
- Optional Approver: The approval workflow will move forward without waiting for the optional approvers if either all mandatory approvals are made or an Authorized Approver has approved the Document
- No obligations to approve
- They have the option and ability to approve or reject
- Authorized Approver: The approval workflow will move forward when one of the authorized approvers on the same cycle approves the document
- Authorized means you have authority to approve but you do not have to approve
- Only one of the authorized approvers’ approval let the approval process move on to the next cycle
- They have an option and ability to approve or reject
- Mandatory Approver: The approval workflow would move forward ONLY if all of the mandatory approvers on the same cycle approve the document.
- In order to have the approval process move on to the next cycle, all Mandatory Approvers have to take action OR be removed from the Document as an Approver
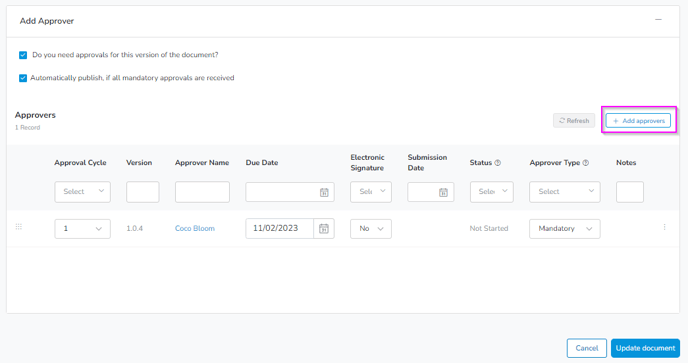
 *PRO TIP* Approvers can be added after the creation of a Document. To do so, click the Add Approvers button from the source document. Approvers and their cycle, due date, and type can be added and edited any time prior to publishing a Document.
Approval Process
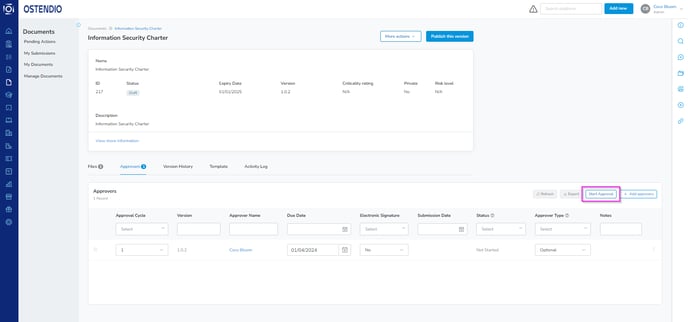
- To begin the Approval Process, click Start Approval. At this point, the ability to change the Approver details and hierarchy will be locked, and those who are part of Approval Cycle 1 will be notified and receive an action to Approve the Document.
To approve a document:
- After having been notified that the approval of a document is required, you can access the document in a few different ways within Ostendio:
- On the Ostendio homepage, under My Activity in pending actions.
- From the Documents module (accessible from the left pane on any Ostendio page) in Pending Actions.
- Or, if you know the name of the document, you can find it manually in the Manage Documents tab in the Documents module.
- You can access the approval in 2 different ways:
- To access from the My Activity Dashboard, find the approval requirement under the complete list of Pending Actions or from Pending Actions by Module. Select "approve" to be directed to the Document to fulfill your Approval requirement.

-
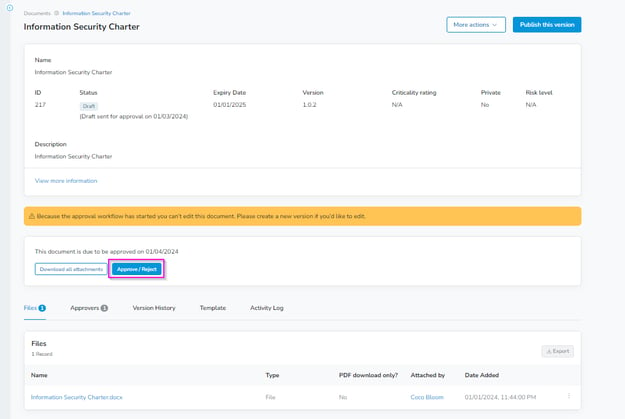
- To access from inside the document’s overview page, go to the Documents module, click My Documents, and select the document that needs your approval. click the blue Approve/Reject button.
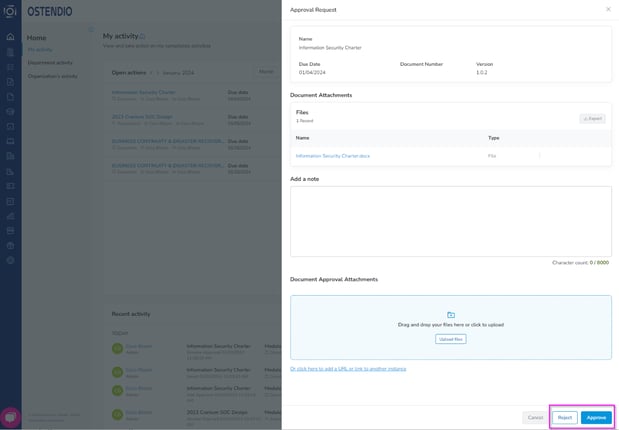
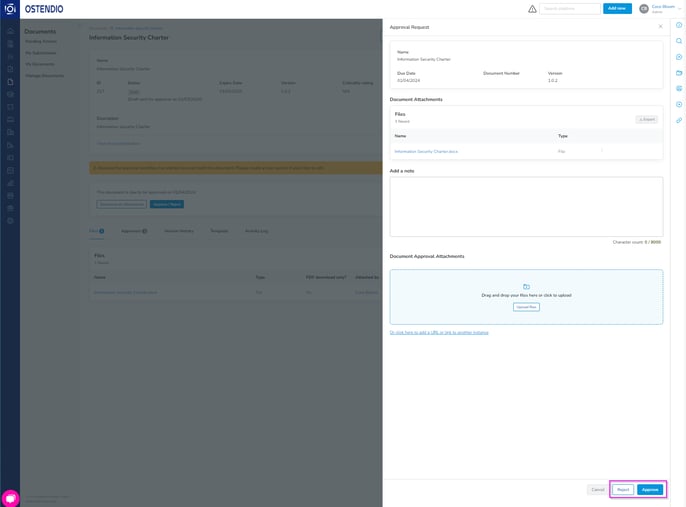
- Add any additional notes and/or upload any attachments with an approval (optional).
- After reviewing the document, select to either Reject or Approve the document.
When all Approvals that are required for a given cycle are Approved, the Approvers on the next cycle will be notified and receive a Pending Action to complete their Approvals. When Approvals for all cycles are completed, publish the Document!
The Document can be set to automatically publish after approvals from all Mandatory Approvers during creation of the Document
