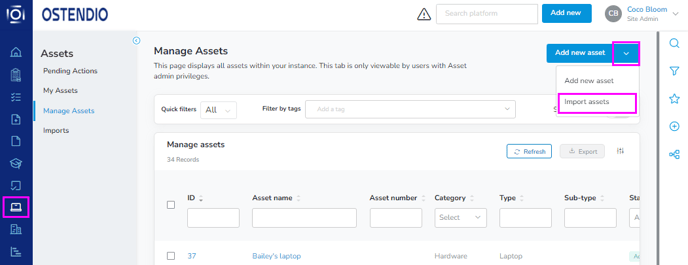
- From the Assets module
 located in the left side tray, you are able to import new assets from the Imports tab, the Manage Assets tab, and the My Assets tab.
 - Click on Import new asset dropdown arrow, this will provide you with two options.
- Add new asset
- Import assets
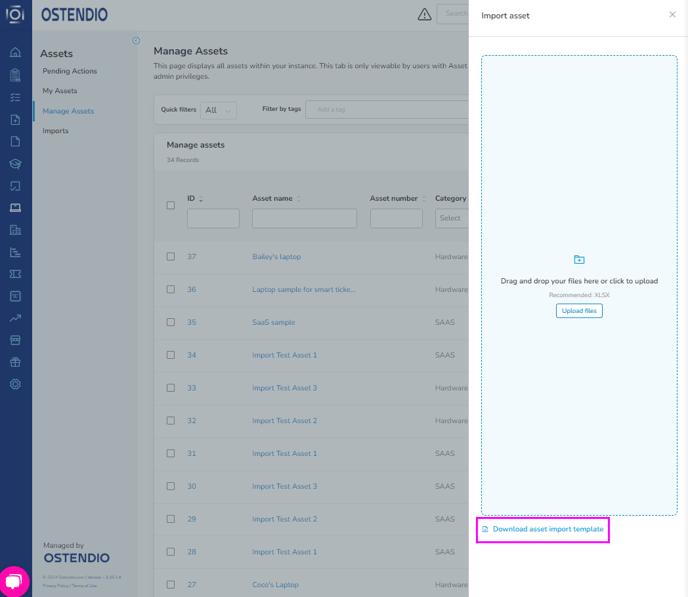
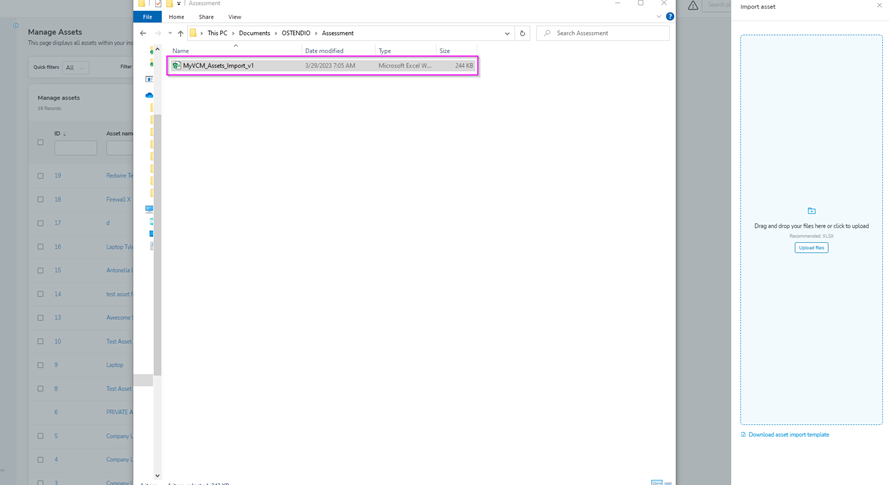
- Click Import assets to bulk import assets, this will prompt a popout menu on the right-side panel with two options:
- Upload files
- Download asset import template
- To bulk import, we are going to use the second option: Download asset import template
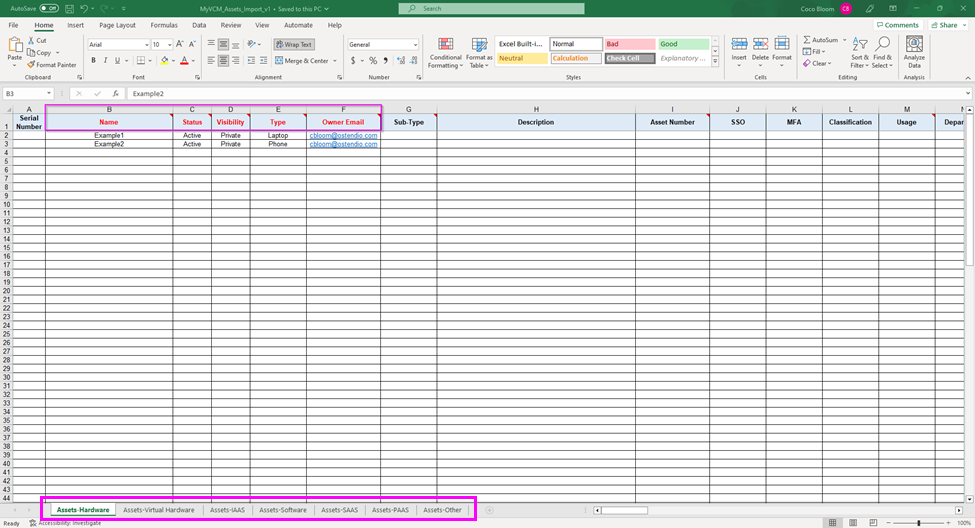
- This template contains 7 tabs categorized by asset type. The red columns are the only necessary fields that must be filled out. These fields provide the system with the information it needs to populate the assets in bulk.
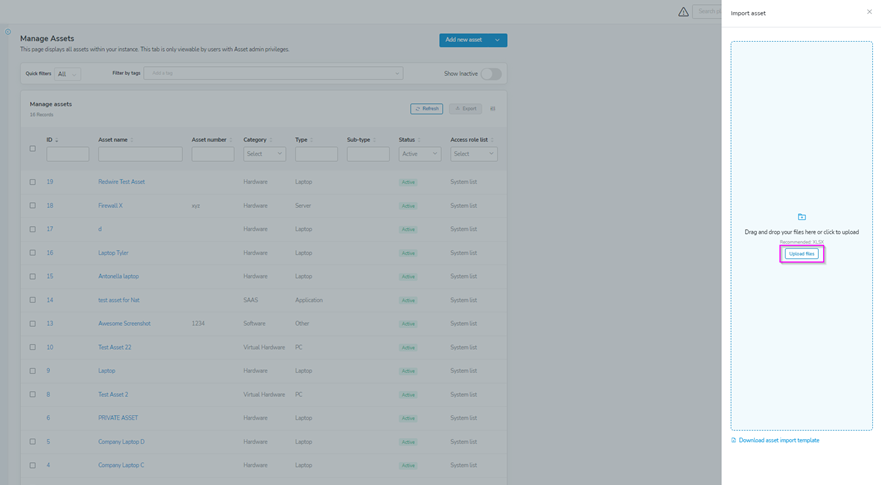
- Once that information has been filled out in the spreadsheet, click Upload files in the Import asset side panel that previously opened. Select the spreadsheet from where you saved it and upload it to the Ostendio Platform.
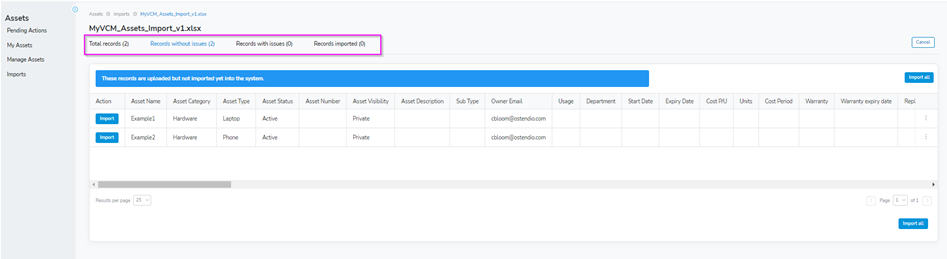
- This will import all the assets from the spreadsheet into the platform. From here, we can see four tabs:
- Total records
- Records without issues
- Records with issues
- Records imported
- After all records are without issues, we can import them by either uploading them individually with the Import button to the left of the asset or in bulk by clicking the Import all button which is located at the top and bottom of the asset list.
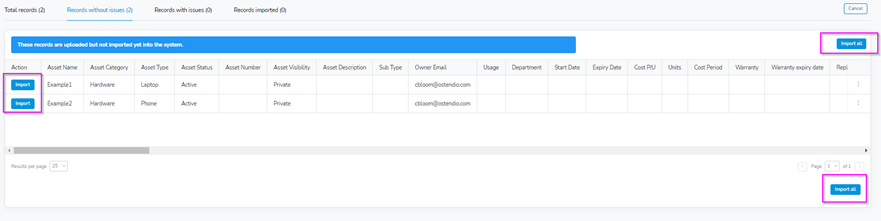
- After clicking Import, we will see a blue banner across the top of the asset list stating the following: “These are all the records included in your file that have been imported.” We will also notice that the number of records from the Records without issues tab has been moved to the Records imported tab now that they have been successfully imported.
