Create a new NC/CAPA ticket
- Click the Add New button from the right-side menu.

- Select Ticket

- Navigate to the System templates tab and click NC/CAPA

- Input the title of your ticket
- Select the NC/CAPA ticket type
- Select the type of nonconformance (optional)
- Choose whether you want this ticket to be public or private (optional). Making a ticket private means that only the Owner and Custodians of the ticket will be able to view the information contained within the ticket.
- Select the priority of the NC/CAPA ticket. It will range from lowest - highest priority
- Enter the date and time that the non-conformance occured
- Provide detail on the nonconformance answering:
- What is the issue?
- Why is it deemed an issue?
- Where did the issue occur?
- Who reported it?
- Enter the date and time of when the non-conformance was reported.

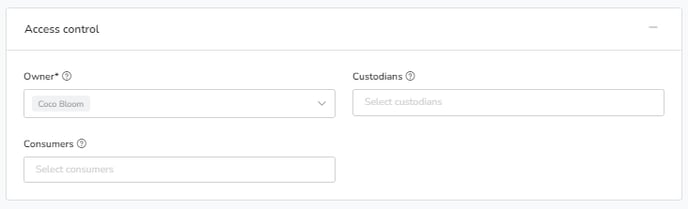
- Under Access Control, choose who will be the owner and custodian(s) of the CAPA ticket.
Select Save & Move to Next Step to move to the next step
-
- NOTE: All information entered in Step 1 cannot be altered after moving to the next step if Lock CAPA steps after creation is toggled on.

- NOTE: All information entered in Step 1 cannot be altered after moving to the next step if Lock CAPA steps after creation is toggled on.

Step 2: Allocate Team
- To begin, click the View Nonconformance button and you will then be brought to Step 2 - Allocate team
- Click the ‘Action’ button on the top right and then click ‘Edit’
- Select which users you would like to assign to each step or click the radio button to Assign the same person for all steps.

- Add additional custodians (optional)
- NOTE: Process leads can be changed at anytime by returning to Step 2. Only the process lead can edit its assigned step. Additionally, on approvers will only be notified after a step they have been assigned has been completed. Their approval will be required to move on towards the next stepNext, designate your CAPA Team. Choose who will be the process lead for each step, and if necessary, the approver of that step as well.
- Choose if electronic signatures are required for process leads or approver
- Choose if you need to add an approval requirement.
- Select Save and Move to Next Step to complete this step


Step 3: Prepare for potential CAPA
- You will then be brought to Step 3 - Prepare for potential CAPA
- Choose the affected artifact in Ostendio
- The artifact's description will be automatically applied to the description field. You may also enter a new description of the artifact(optional)

- Under Other Areas Affected, enter the other items that are affected by the nonconformance that are located in Ostendio (optional)

- Additionally, you can add custom fields if there is other data needed to track your nonconformance

- If you are not the Process Lead for Step 4 you can click Save & Move to Next Step to advance. If you are the process lead, you will be asked to approve Step 3 or reject it and sent it back to the author.
- NOTE: All information entered in Steps 1 and 3 cannot be altered after moving to the next step if Lock CAPA steps after creation is toggled on in step 1.
- NOTE: All information entered in Steps 1 and 3 cannot be altered after moving to the next step if Lock CAPA steps after creation is toggled on in step 1.
Step 4: Containment
- To begin, click the View Nonconformance button and you will then be brought to Step 4 - Containment
- Click the Action button and select Edit to make changes to your ticket
- Ostendio Risk Score Matrix
- Choose the frequency and the impact of the non-conformance
- Ostendio will recommend a risk level based on the two responses
- PRO TIP: Click on the question mark next to the Risk Score result to display the Risk Score Matrix scoring model, along with the descriptions of the rating levels to self assess on
- Check the box if you would like to use Ostendio’s Risk Score Matrix to help determine the risk level of the nonconformance, or choose ‘Select Score’ from the drop-down menu
- Enter a statement about the impact of the non-conformance in the Impact Statement box (optional)
- You can enter details about the immediate containment in the Immediate Containment box (optional)
- If completed, enter the date of the containment
- NOTE: The non-conformance must be contained or not required before moving forward. Next, select if the containment has been completed

- Select Link Ticket if you have any other tickets related to the non-conformance that you would like to associate with the NC/CAPA ticket

- Select:
- Record Observation & Close if no corrective action or further steps will occur and you would like to close the ticket
- Select Investigate Further (Move to CAPA) if a corrective action needs to occur and the CAPA process needs to continue
Step 5: Diagnose the Problem 
- To begin, click the View Nonconformance button and you will then be brought to Step 5 - Diagnose the problem
- Click the Action button and select Edit to make changes to your ticket
- Enter any notes you have on the investigation into the non-conformance/CAPA in the Investigation Notes field
- Next, enter your findings on the root cause in the Root Cause box
- Enter any additional notes or attach any new files (optional)
- Select Save & Move to Next Step
NOTE: All information entered on Step 5 cannot be altered after moving to the next step
Step 6: Resolve Issue 
- To begin, click the View CAPA button and you will then be brought to Step 6 - Resolve issue
- Click the Action button and select Edit to make changes to your ticket
- If documenting a corrective action and/or a preventive action, select the Add Corrective Action or the Add Preventive Action box
- Enter the proposed corrective and/or preventive action and your verification plan
- Add any additional notes or attachments related to your CAPA
- Next, if you have another ticket to link to the CAPA that’s related, select Link Ticket
- Enter in the due date for the corrective action verification
- Select Verification Complete when verification has been completed.
- Select Save & Move to Next Step to move to the next step
-
- NOTE: All information entered on Step 6 cannot be altered after moving to the next step
- You will only move onto Step 7 if you have indicated that you plan to take a Corrective or Preventive Action
Step 7: Validate resolution
- To begin, click the View CAPA button and you will then be brought to Step 7 - Validate resolution
- Enter in the due date for the corrective actions to be validated
- Check the ‘Validation Complete?’ box once your validation is complete
- A new required option will appear to enter in the ‘Date Completed’
- NOTE: This box is required to move to the next step. If your validation has not been completed, skip to the next step. Use the Save button to save your work. Finish step 7 by returning to the NC/CAPA ticket once validation is complete to check this box and move to the next step.
- Use the text box to enter in the plan for the validation under ‘Validation Plan’

- Next, if you have another ticket to link to the CAPA that’s related, select Link Ticket

- Select Save & Move to Next Step to move to the next step
- NOTE: All information entered up through Step 7 cannot be altered after moving to the next step
Step 8: Close Ticket
- Once ready to close the NC/CAPA ticket, select Close Nonconformance
- A new required option will appear to enter in the ‘Date of Closure’

Points of Note
- If you delete a CAPA ticket, you will also delete all of its history from Ostendio
- You can print a PDF of the whole CAPA ticket to show to an auditor or other stakeholder
- You can forward the ticket at any point to other users