When an employee joins an organization, you need to provide access to multiple systems, devices, documents and training. Ostendio allows you to create one ticket to manage the on-boarding process. This is especially helpful when you are on-boarding several employees at once.
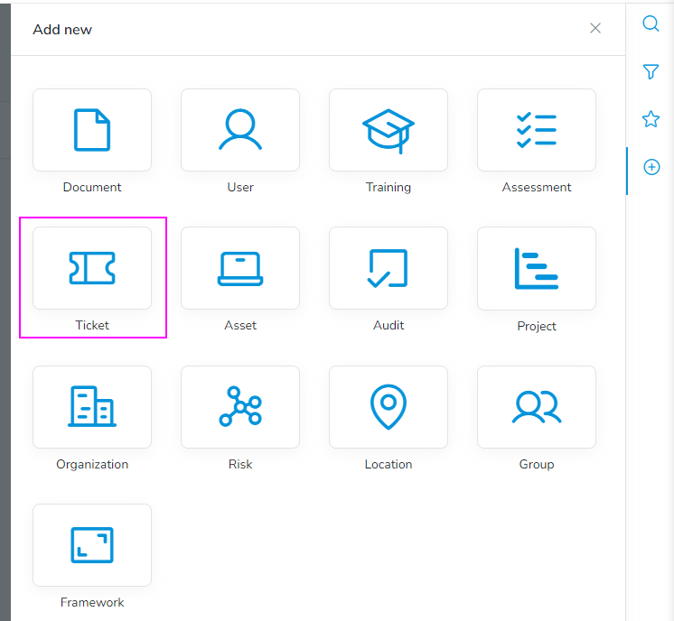
- To onboard an employee using a smart ticket, Click the + icon in the universal side tray to the right.
- Click Ticket.
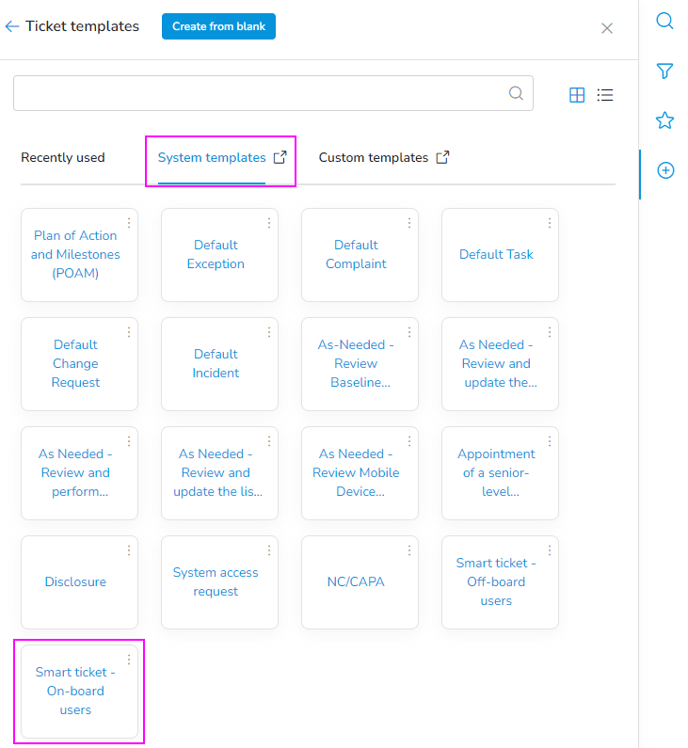
- Select the System Templates tab.
- Choose the system-provided smart ticket: Smart ticket - On-board users.
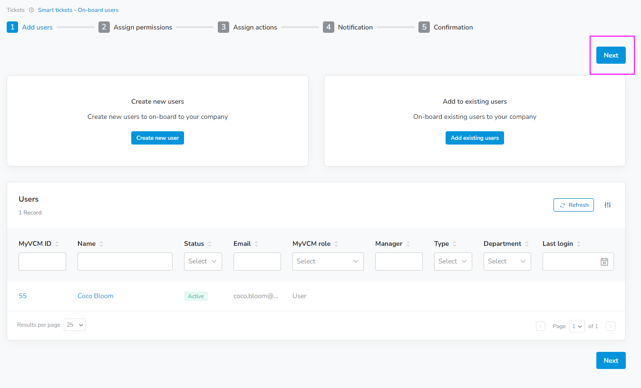
- You will be prompted to choose to Create new users or Add to existing users.

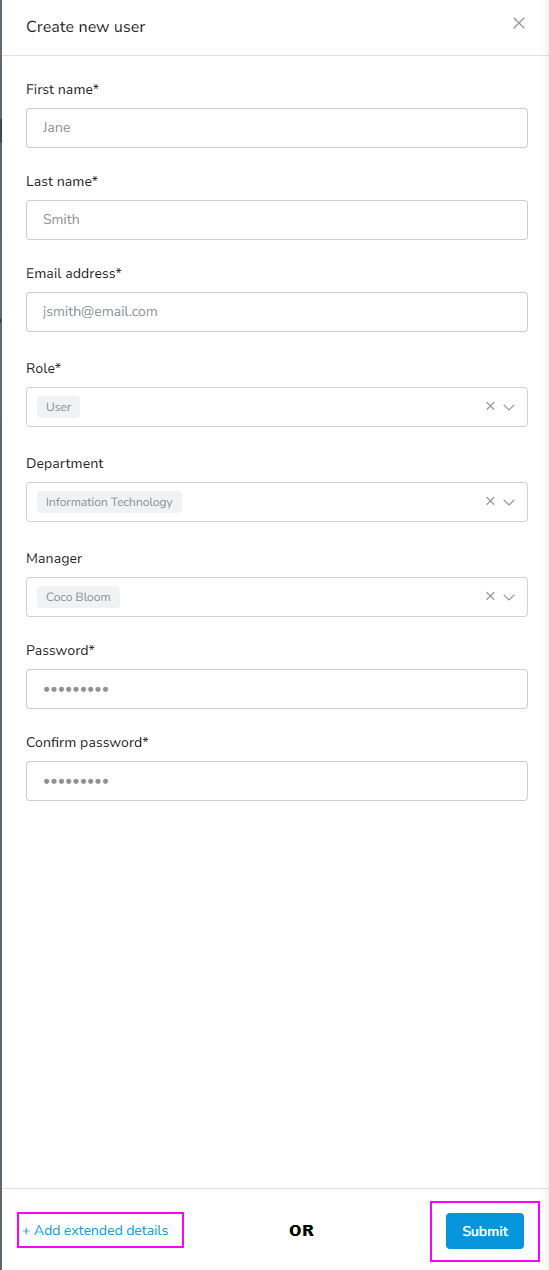
Create new user
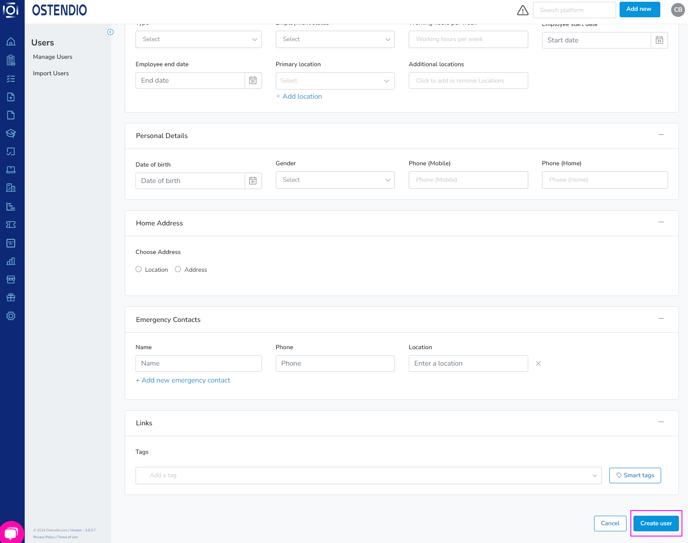
- To create a new user, fill out all user details and create a password for this user. You can then click Submit or + Add extended details to the user's profile. After adding any additional information, you can click Create User.
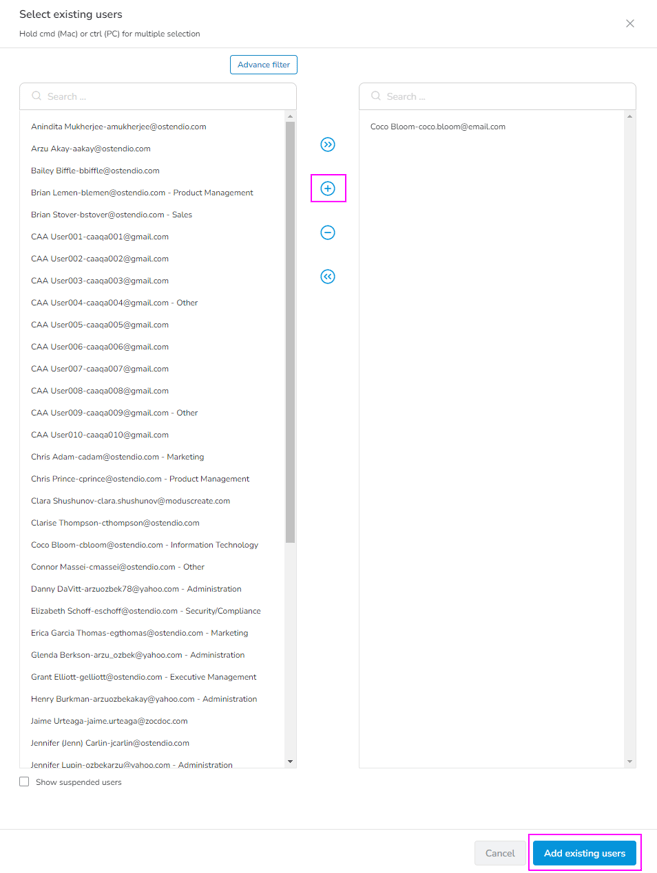
Add to Existing Users
- Select the users that you would like to onboard and click Add existing users
- Click Next
-
Assign permissions
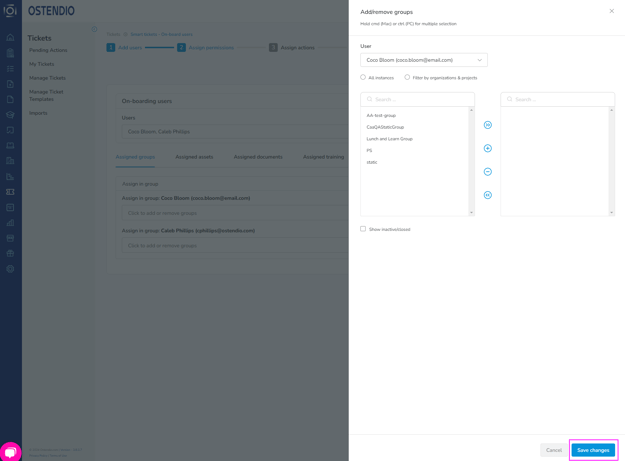
- Expand the collapsed rows to choose the group(s), asset(s), document(s), and training(s) that you wish to add your employee(s) to
- Under ‘Groups’ click into the corresponding box to add the employee a group (optional)
- Click Save changes to complete
- NOTE: Only static group-types will be available to assign the employee to
- Under ‘Assets’ click into the corresponding box to add the employee as a owner, custodian, consumer, to add them to an access list, or assign possession of an asset (optional)
- Once inside the add an asset or access list menus, locate the correct asset(s) and use the corresponding arrows to choose the assets(s) to assign the employee(s)
- Click Save changes to complete
- NOTE: If on-boarding more than 1 employee, you will not have the option to add the employee(s) as an owner or assign possession of an asset
- PRO TIP: If on-boarding more than one employee, this is a great time to assign employees to software or systems that most employees will need access to
- Under ‘Documents’ click into the corresponding box to add the employee(s) as an owner, custodian or consumer (optional)
- Once inside the add a document menu, locate the correct document(s) and use the corresponding arrows to choose the document(s) to assign to the employee
- Click Save changes to complete
- NOTE: If on-boarding more than 1 employee, you will not have the option to add the employee(s) as an owner of a document
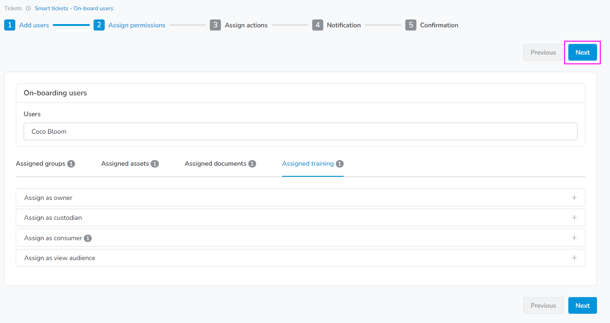
- Under ‘Training’ click into the corresponding box to add the employee as a consumer to a training(s) (optional)
- Once inside the add a training menu, locate the correct training(s) and use the corresponding arrows to choose the training(s) to assign to the employee(s)
- Click Save changes to complete
- Once finished assigning the employee(s) to the group(s), asset(s), document(s), and training(s), click Next to complete.
4. Assign actions
-
- Choose one of the three assign actions:
-
I will take action on all sub-tickets assigned to me
- Select this option if you would like to take action on any new tasks assigned to you after creating a Smart Ticket. Otherwise, select another option to speed up the work required.
-
Automatically assign user(s) to items where I am an Owner/Custodian only
- If you select this option, any items that you have permission to as an owner or custodian will generate sub-tickets in your name that will be closed immediately. Due to the large number of system emails that would generate from creating a smart ticket, the system will not send any email notifications to notify you of this action. This will effectively add/remove the user(s) to the Ostendio item automatically.' + '
This is helpful if you are dealing with multiple items or users.
Please note that this will not close tickets related to the Access List or the In Possession of an Asset, as they require the user(s) to be added/removed from another 3rd-party system.
- If you select this option, any items that you have permission to as an owner or custodian will generate sub-tickets in your name that will be closed immediately. Due to the large number of system emails that would generate from creating a smart ticket, the system will not send any email notifications to notify you of this action. This will effectively add/remove the user(s) to the Ostendio item automatically.' + '
-
Automatically assign user(s) to items where I have permission
- If you select this option, any items that you have permission to as an admin regardless of item owner will generate sub-tickets in your name that will be closed immediately. Due to the large number of system emails that would generate from creating a smart ticket, the system will not send any email notifications to notify you of this action. This will effectively add/remove the user(s) to the Ostendio item automatically.'+'
This is helpful if you are dealing with multiple items or users.
Please note that this will not close tickets related to the Access List or the In Possession of an Asset, as they require the user(s) to be added/removed from another 3rd-party system.
- If you select this option, any items that you have permission to as an admin regardless of item owner will generate sub-tickets in your name that will be closed immediately. Due to the large number of system emails that would generate from creating a smart ticket, the system will not send any email notifications to notify you of this action. This will effectively add/remove the user(s) to the Ostendio item automatically.'+'
-
- In General Information, enter the name for the ticket that will be generated, or use the name generated by default from the platform
- Enter the due date that you require the on-boarding tasks for your employee to be completed
- Set a priority for the employee on-boarding
- Enter a description for the on-boarding ticket. By default, the system will generate a description of the number of items and the names of the employees
- Check the box Close the ticket once all sub tickets are closed to have the ticket automatically change it’s status to closed once all sub tickets generated by any subtasks are complete
- Choose one of the three assign actions:
5. Notification
-
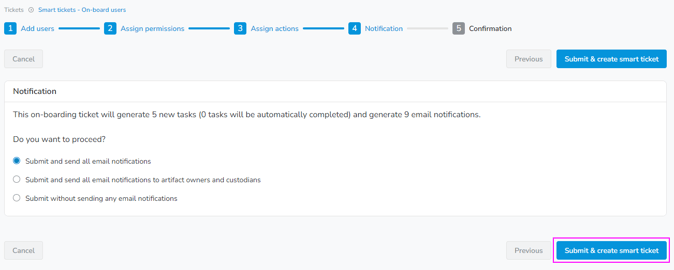
- Select the notification setting you would like to apply for this user's onboarding.
- Click Submit & create smart ticket
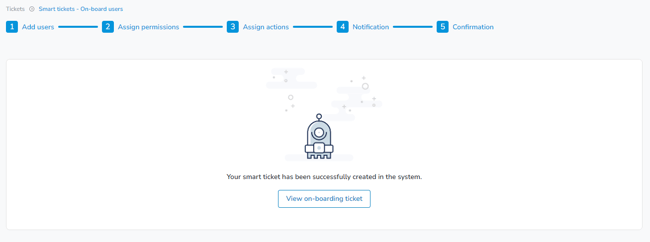
6. After clicking submit you will see the confirmation page stating that your smart ticket has been successfully created in the system. You then have the option to view the onboarding ticket.