Step-by-Step guide:
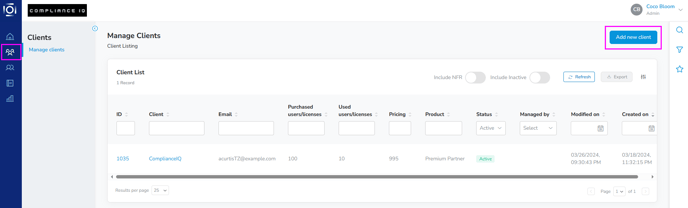
- After logging into your Partner Admin Portal, click on the Clients icon in the left side tray.
- click the blue Add new client button in the top right corner
Product
- Select your new clients' product.
PRO TIP: Use the search bar to identify the parameters for each product level.
- Click Next

Profile
- Enter the Company information
- Enter your preferred URL identifier and click Check availability to ensure that the URL is available.
- If it is available, you will see this message: Congrats! Your domain name is available.
- Enter the Contact information

- Notice that a banner appears at the bottom stating the following: Registration email will be sent to this user with instructions to change their password.

- Click Next
Review
- Please ensure all information is correct.
- Click the dropdown arrow for Create new client. You will be provided with two options.
- Create active client
- Create inactive client
- Choosing the first option will immediately activate the new client. The second option creates the client as inactive. I will walk you through how to activate an inactive client below.

Activating an Inactive Client
- After creating the client, you will be taken back to the Manage clients section in the Clients module.
- Toggle the Show Inactive bar at the top to show all inactive clients.
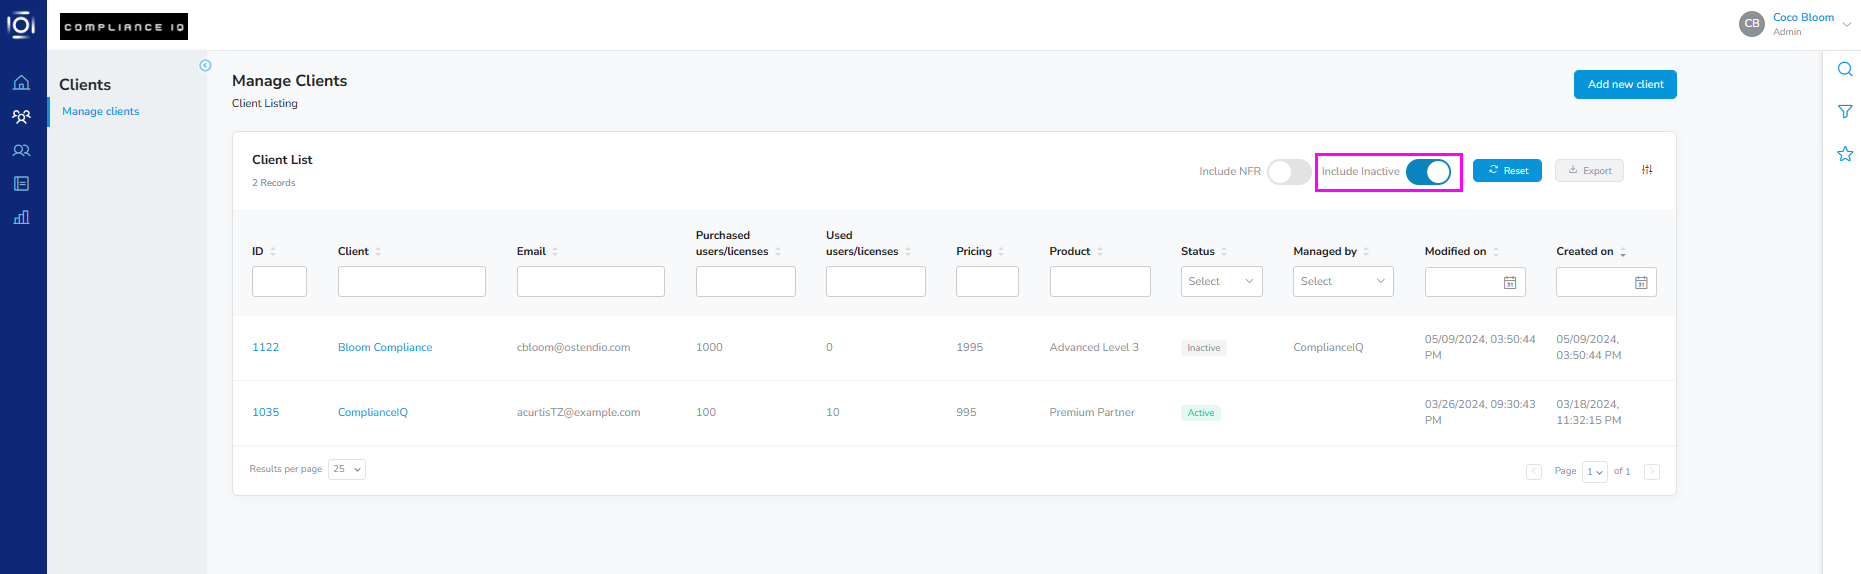
- Click the new inactive client.
- Under the Settings tab, click Activate/Deactivate Account.
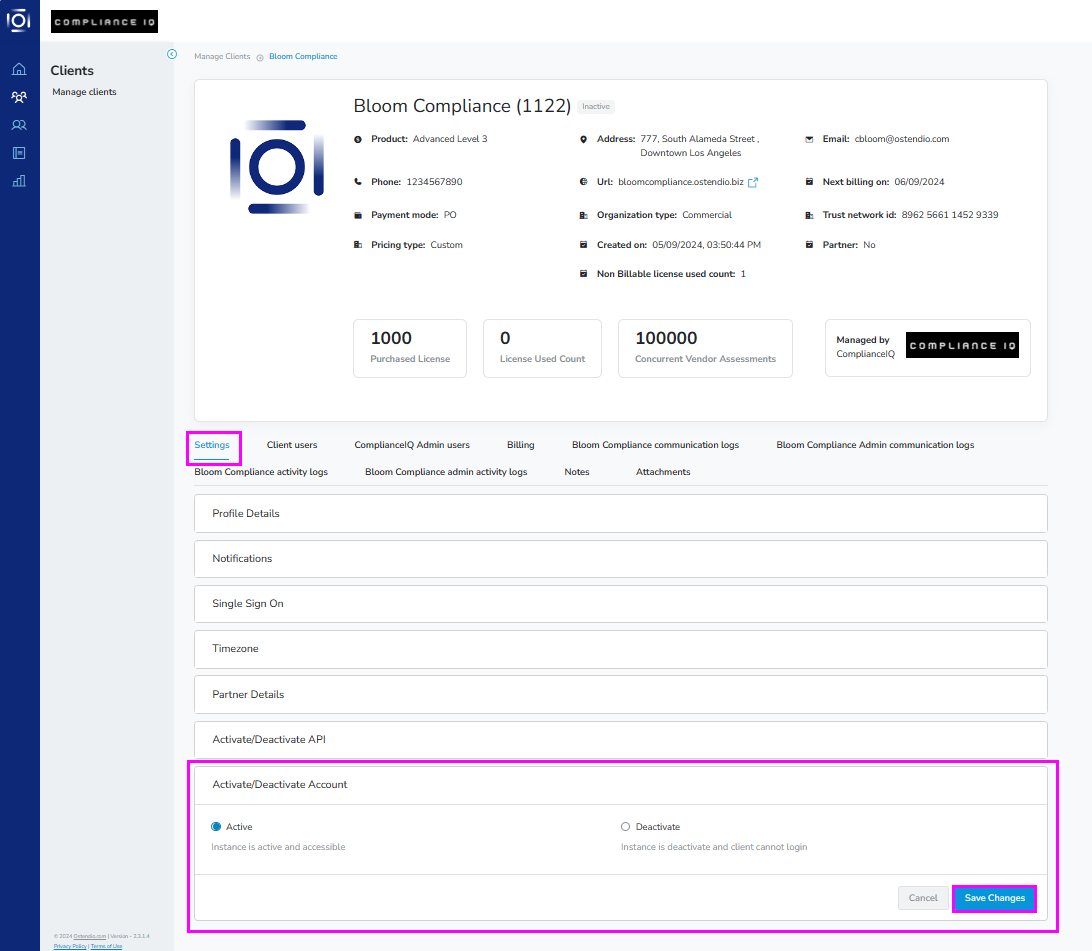
- This section is where you will find the option to activate and deactivate the client. Click Active
- Click Save Changes

- A small box will appear, confirming that the activation was successful.
