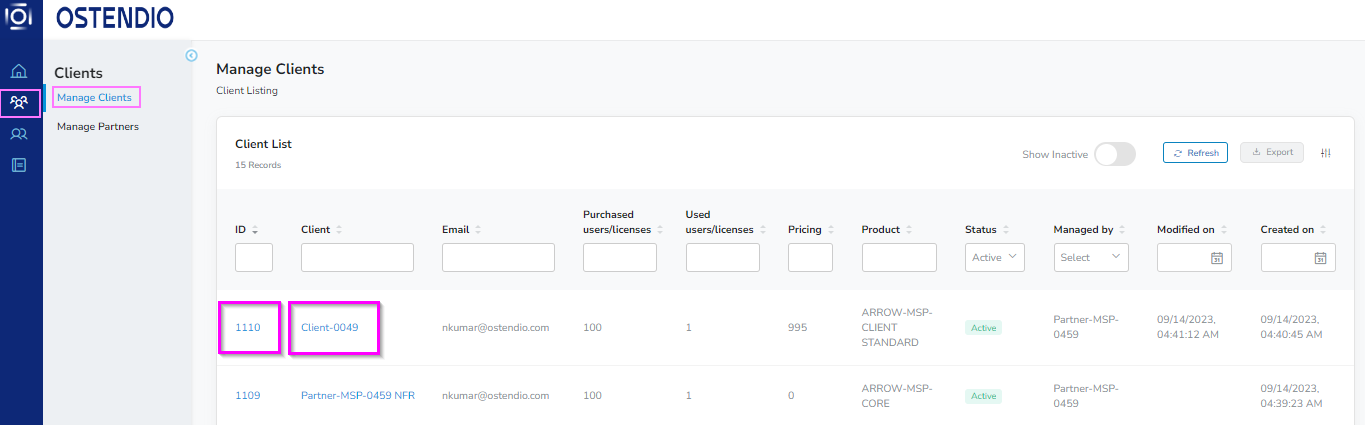
1. Click the Clients icon in the left side tray. You will be taken to the Manage Clients page by default. Select the client you wish to update by clicking on the client name or client ID.
-
- Settings
- Billing
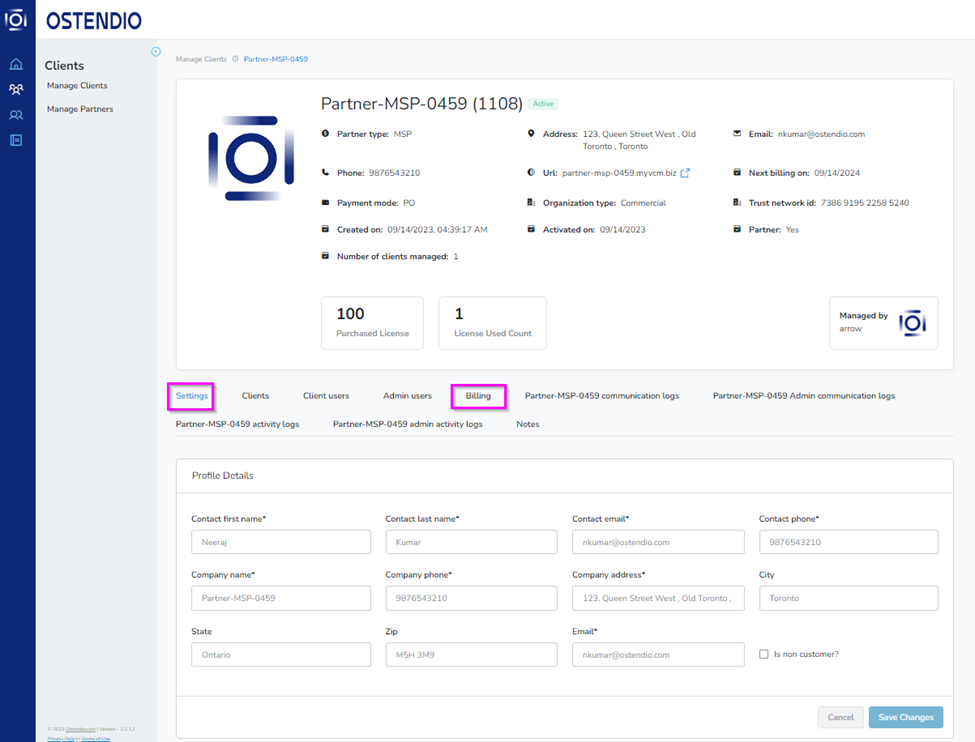
Settings:
By default, the Profile Details section will display when entering the Client Settings. There are 8 expandable sections within the Settings tab.
- Profile Details
- Products
- Notifications
- Single Sign On
- Timezone
- Partner Details
- Activate/Deactivate API
- Activate/Deactivate Account

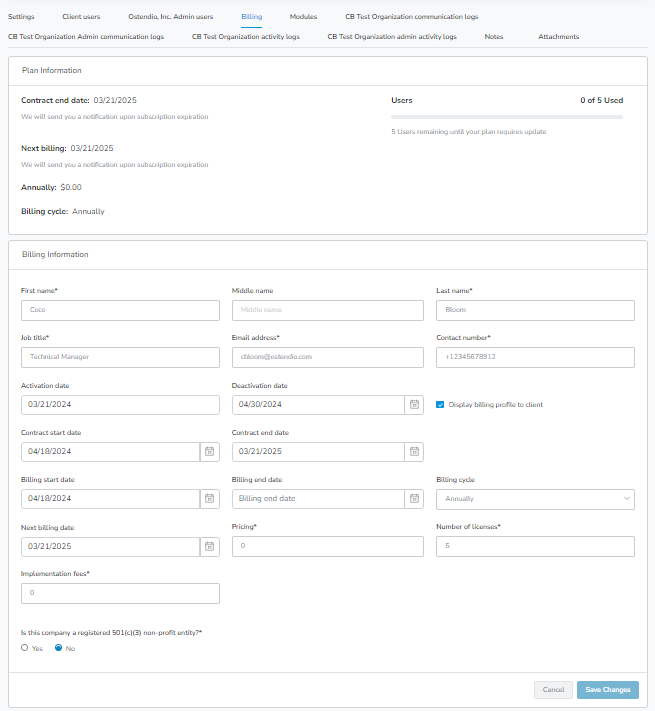
Billing:
The Billing tab provides Plan Information and Billing Information. The Plan Information section provides client contract, billing, and user license information.