The Setup
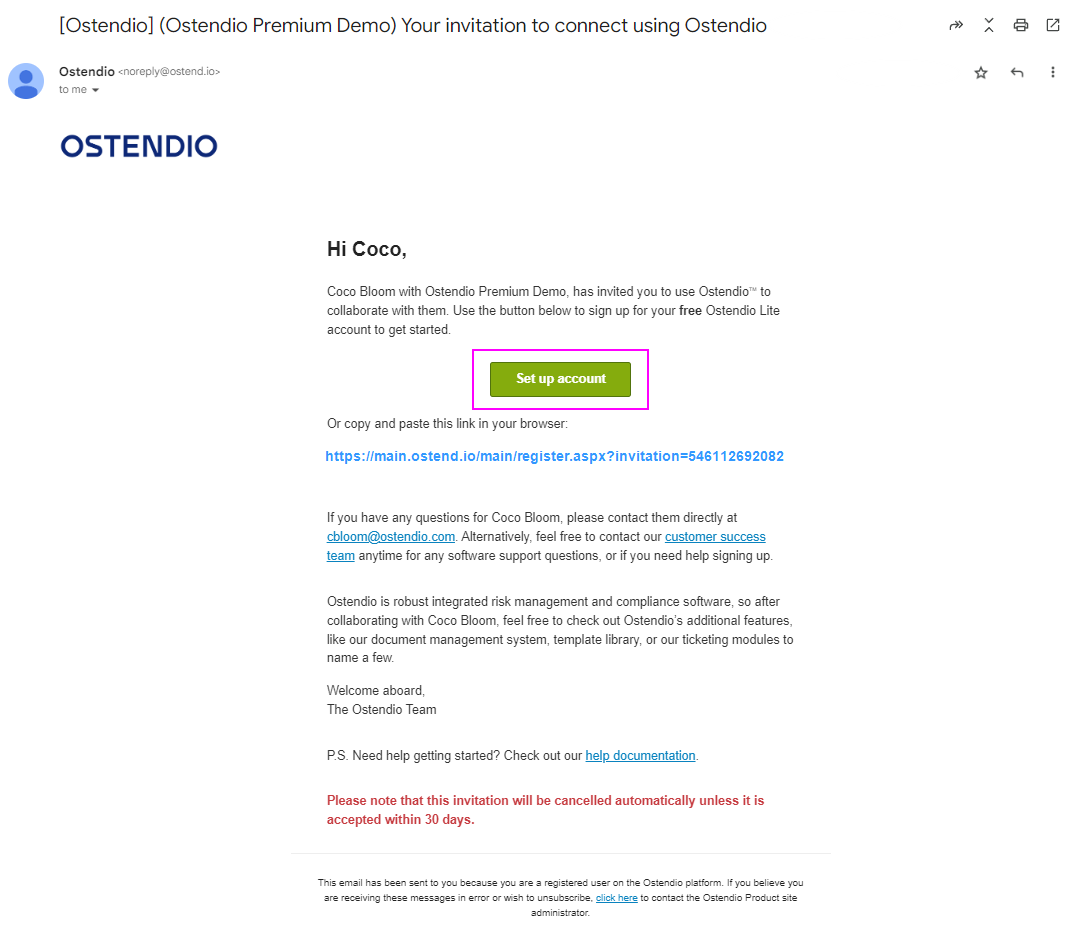
- To begin the process of completing your Assessment, you will receive an email inviting you to use Ostendio to collaborate with the client. You will be provided with a Set up account button to select and a link that you can copy and paste into your browser.
*This invitation will be automatically canceled within 30 days if it is not accepted.
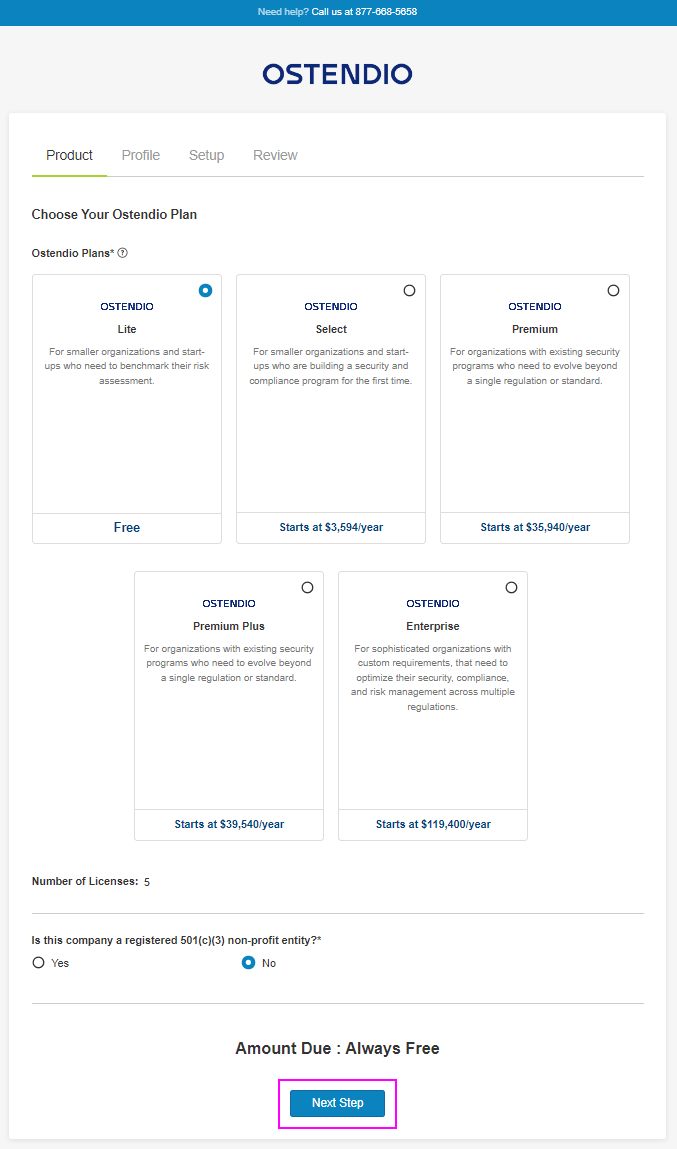
- Once you have clicked the Set up account button you will be brought to the signup page where Ostendio Lite is automatically selected for you. This is a free version of the software to use for completing external assessments or questionnaires that are requested.
- Answer whether or the company is a registered501(c)(3) non-profit entity
- Click Next Step
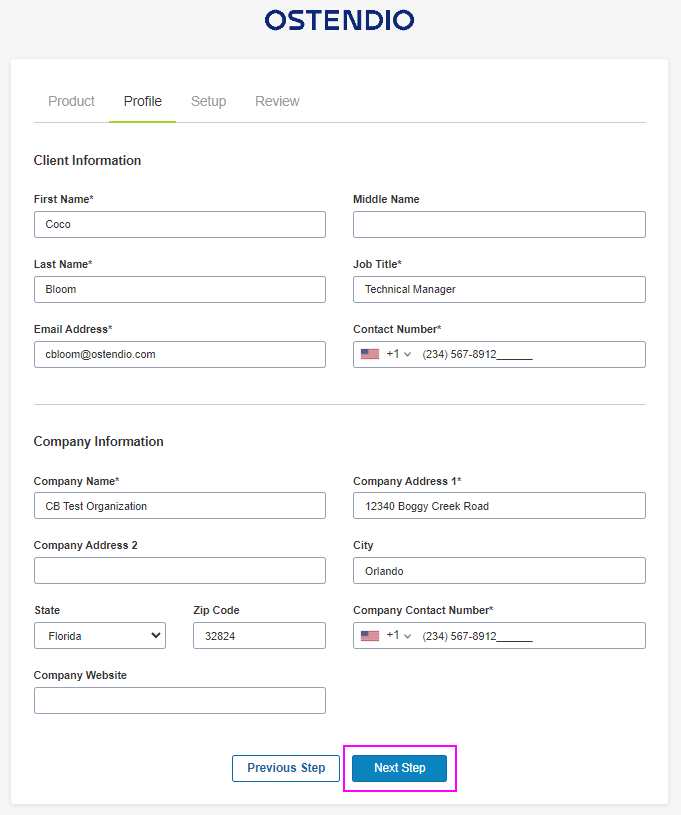
- In the Profile step, you will enter the information required to set up your profile and then click Next Step
- Required information:
- Client Information
- First Name/Last name
- Job Title
- Email Address
- Contact Number
- Company Information
- Company Name
- Company Address (Upon entering your address, the remaining address information should populate)
- Company Contact Number
- Client Information
- Required information:
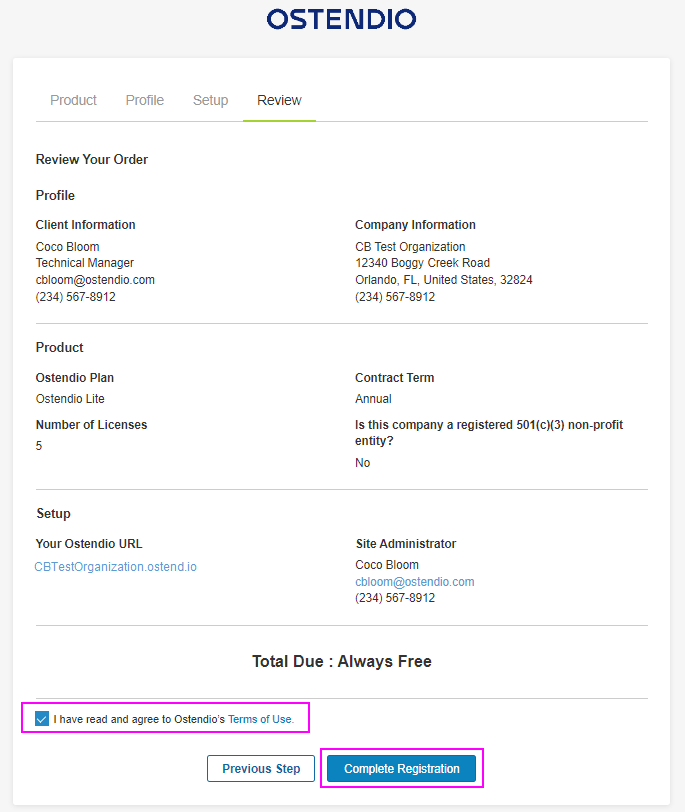
- Next, create a Ostendio URL by adding your company name to the Identifier box. You may also use the recommended domains provided by our system. After you have made sure that the domain is available by clicking the Check Availability button you can move on to the Site Administration Details. If this information is the same as the information you added during the Client Information step you may check the box that says Copy from “Client Information”.

- Lastly, review your profile, product, and setup information. Once reviewed, click the check box confirming that you have read and agree to Ostendio’s Terms of Use.
-
- Click Complete Registration
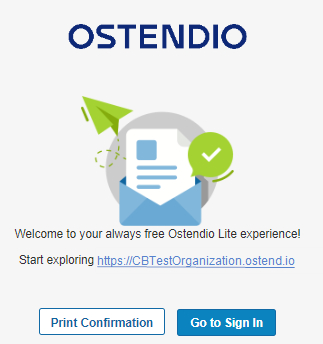
- After clicking Complete Registration, a window will appear with a link to sign into your instance. Click Go to Sign In
-
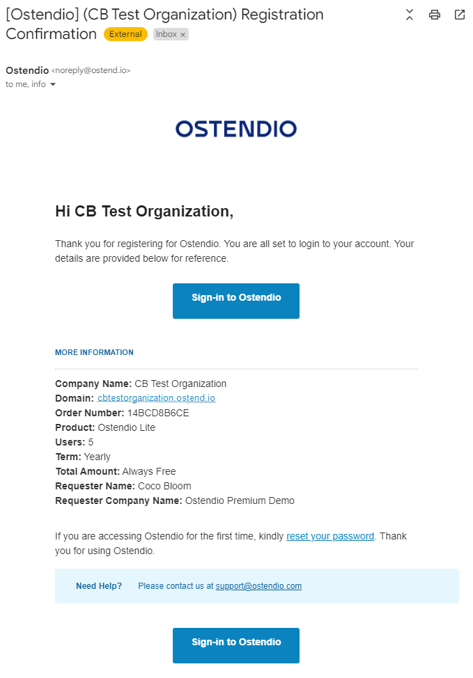
You will also receive an email with your Registration Confirmation
Accessing your Assessment
- Once you have logged into your instance you are immediately brought to the Information Section within your required assessment. Select the Questions tab to start filling out your assessment.

- Pro Tip: If you need to communicate with the requesting client, use the Chat feature. This will allow you to keep all information regarding this Assessment in one place!
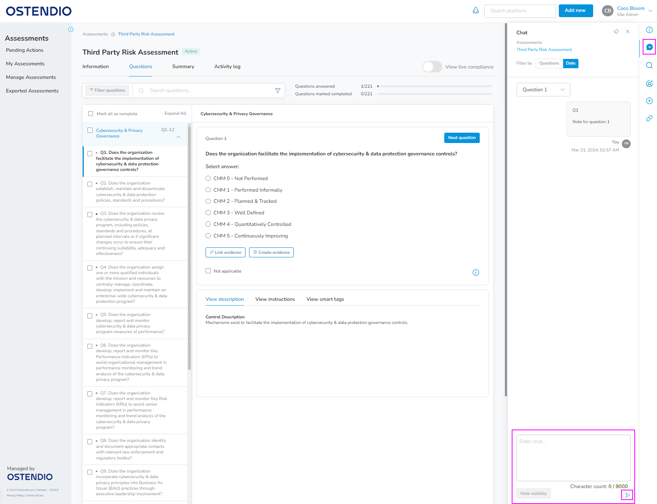
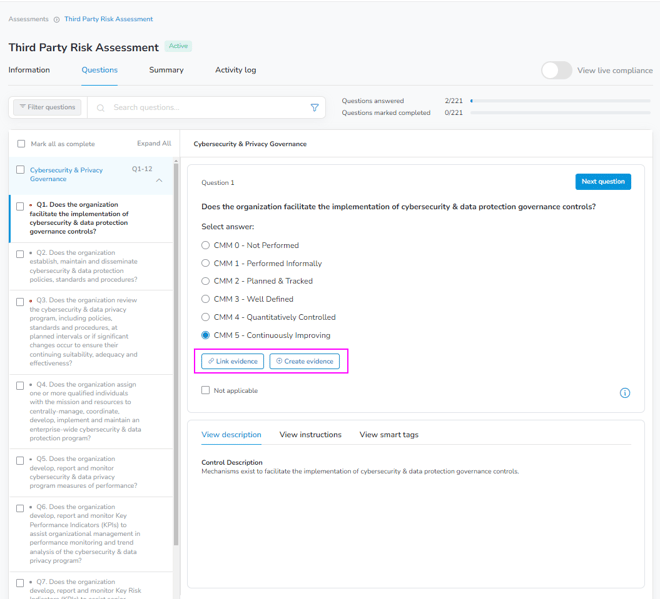
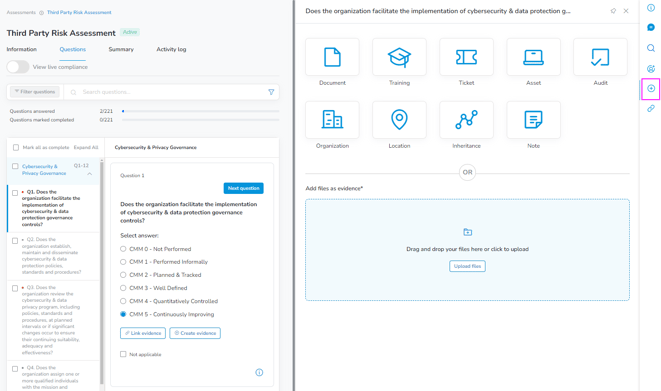
- To complete the assessment, answer each question and add any requested evidence. I will provide some examples of how to add evidence to your assessment questions below. You can add evidence either by clicking Link Evidence/Create Evidence displayed under the Question or clicking the Add new + button.
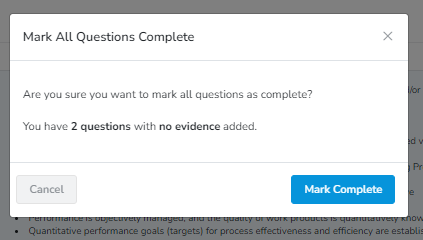
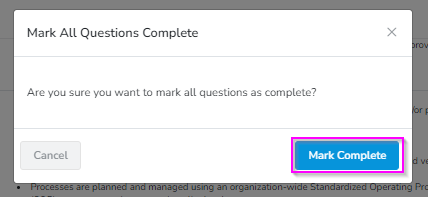
- Once all of your questions have been answered and the evidence has been applied, you will see an option at the bottom of your last question stating Mark all questions as complete. Upon clicking this button you are brought to a pop-up asking you if you are sure you want to mark all questions as complete.
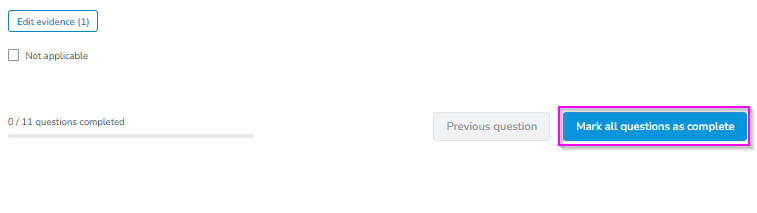
- If you have any questions that are missing evidence/incomplete this pop-up will alert you.