Creating User Roles:
1. In the System Settings, you will notice a Role Management Settings feature at the bottom of the page. Click on Configure Roles to create or edit a role and assign permissions.

2. You will be directed to a list of current roles in Ostendio. To create a new role from scratch, click Add role.

3. Unlock the role dashboard by clicking the button to the right. Once unlocked, grant the level of permissions for the role (View, Create, Edit, Delete) by module.
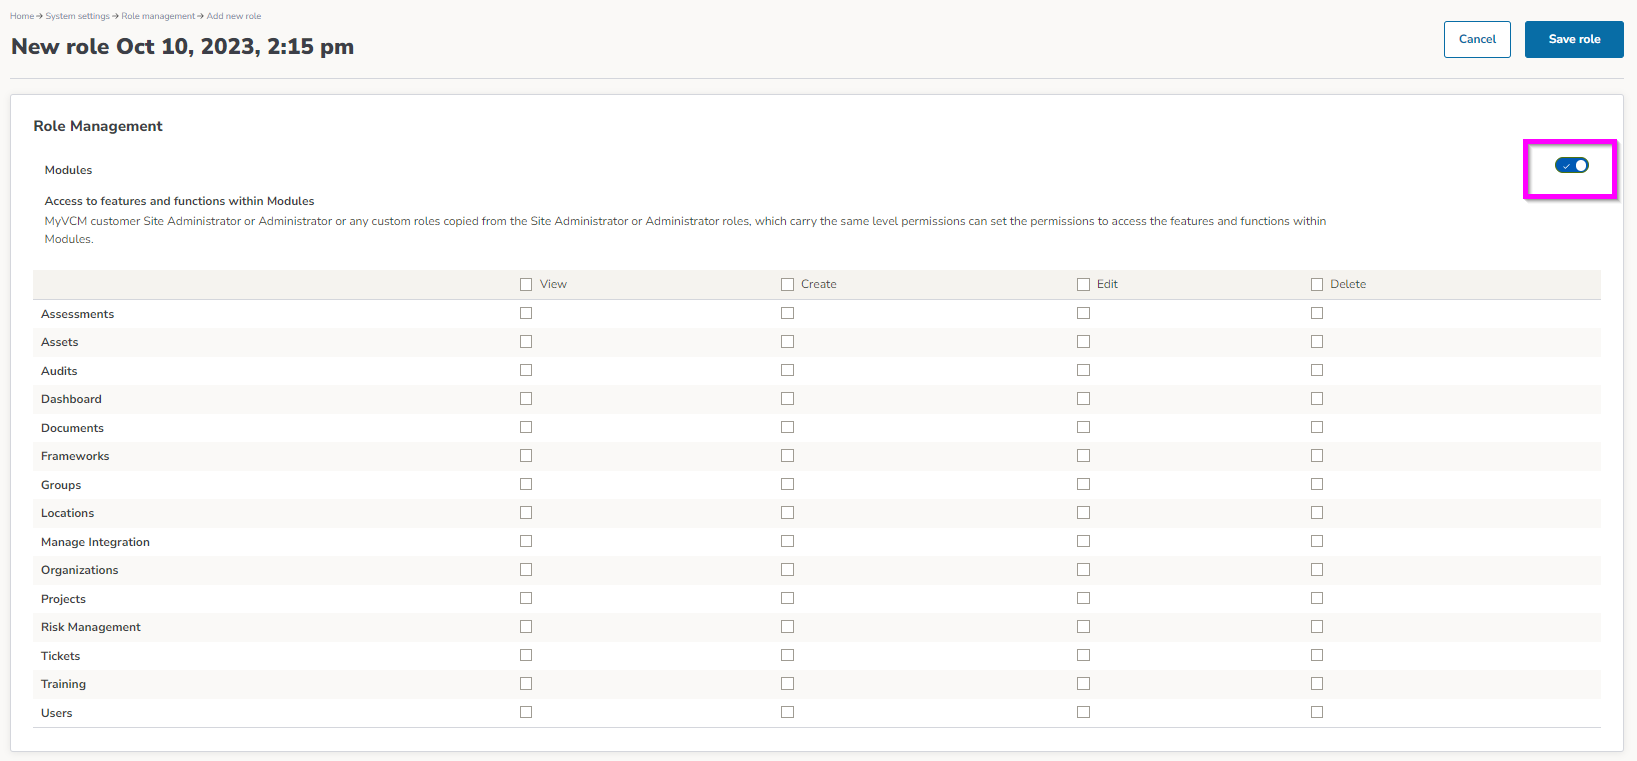
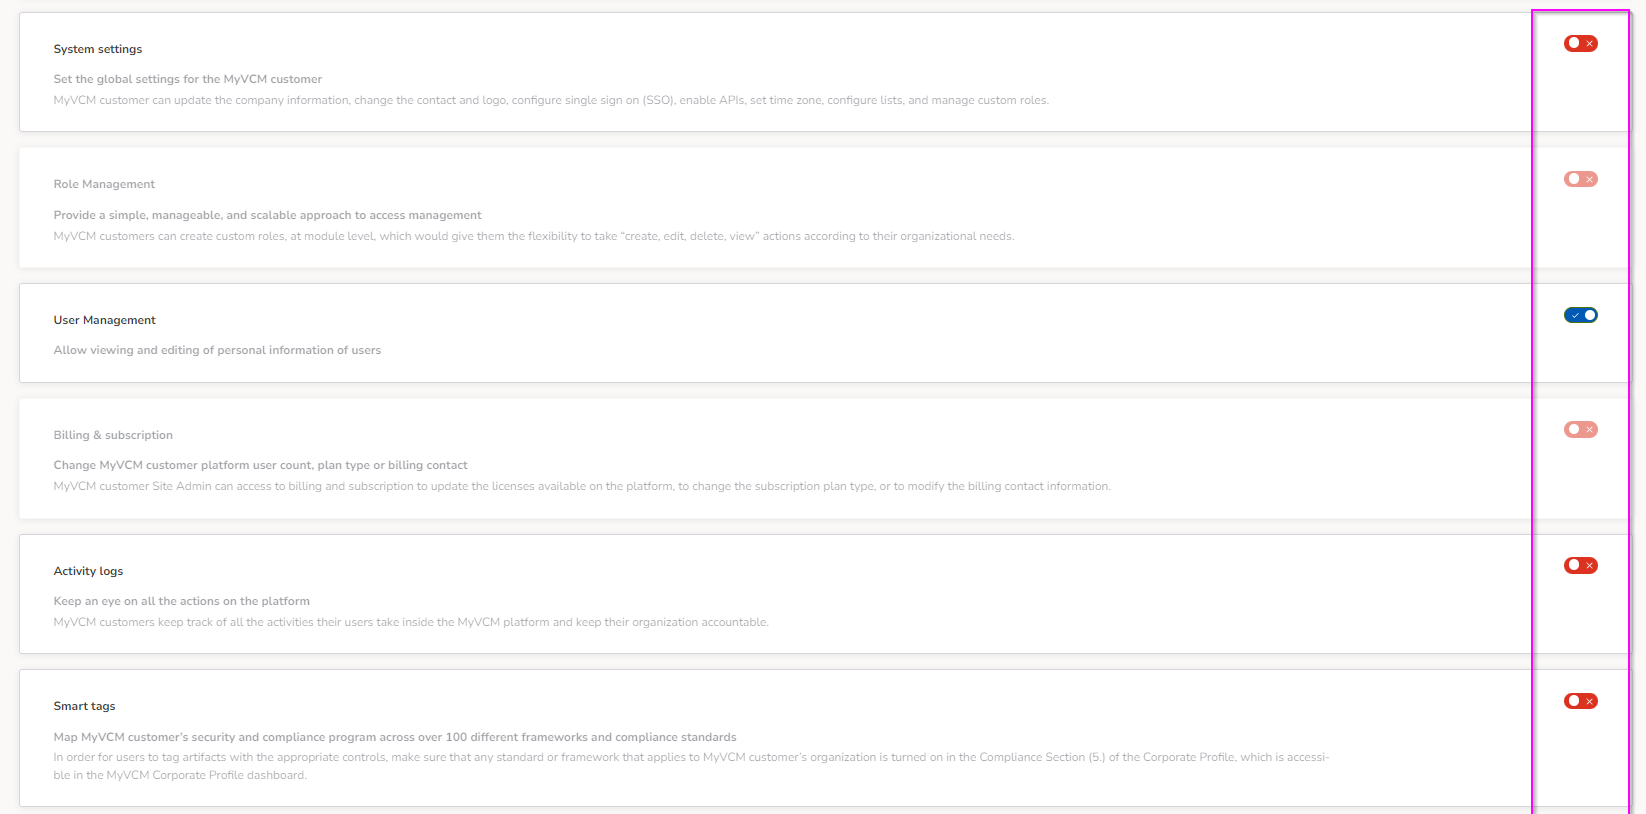
4. Next, toggle on or off other access and permission areas of the platform for the newly created role. A descriptor is visible for each area to help explain what access each permission grants to a User within the role being created. Select Save Role.
5. To edit an existing role, from the main Role Management dashboard, click on any role to see the current permissions associated with the role. To make updates or change the permissions to a role, select the settings icon ![]() and choose edit role.
and choose edit role.
*PRO TIP* You will also notice the clone and create new option. This will copy all permissions from the cloned role, but allow you to add or remove any additional permissions.

For more information about Role Management and how the permissions work, see our Role Management FAQs, here.